
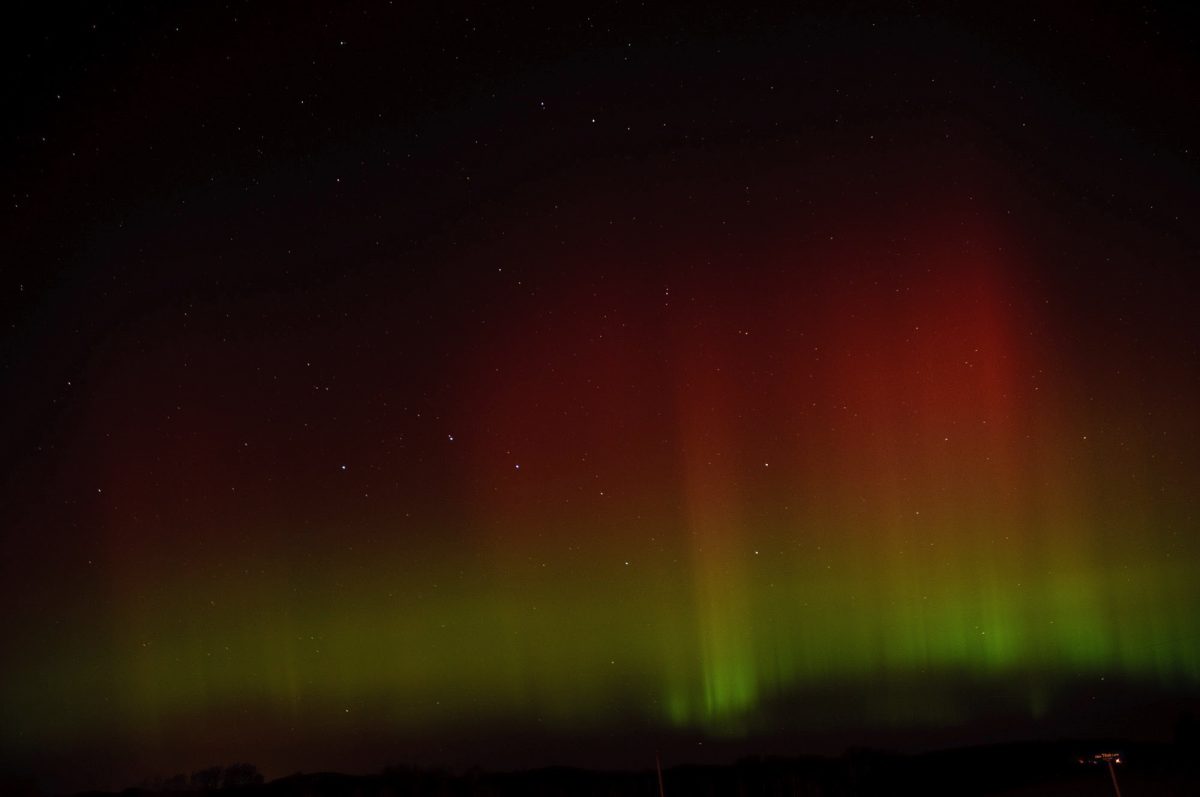
For those of us on the East Coast of Canada, there aren’t too many chances to see the Northern Lights. Sometimes there are solar flares and other activity that make it possible. The first time I saw them, I was trying to photograph some meteors and instead got treated to the Aurora Borealis! Thought I’d share tips on how to shoot them if you are fortunate enough to see them.
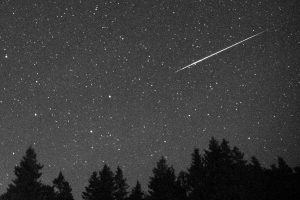
So I went over to Gorham’s Bluff for a nice dark spot to shoot the Draconid Meteor Shower last December…and all my photos were ruined by this stupid red and green light in the sky…
Oh wait, that’s the Northern Lights!
Something I have never seen before, and something that is a bit rare in my part of Canada (New Brunswick, on the East coast. Next to Maine for my American visitors who may have never heard of it)
So needless to say, I forgot all about the meteors and started shooting the sky!
EXPOSURE/CAMERA SETTINGS
MANUAL MODE (M) is best
WHITE BALANCE: Try DAYLIGHT, or shoot RAW so you can adjust later if needed
ISO:400 (you might need a higher ISO if you lens aperture isn’t very wide)
SHUTTER SPEED: Anywhere from 15-30 seconds is usually good, but you can go longer if you like. To do longer than 30 seconds, you will need to switch to BULB mode and hold down the shutter as long as you want it to be open.
APERTURE: Widest possible (smallest number) 2.8, 3.5
LENS: Wide angle!
FOCUS: Manual focus will be best, since the camera probably won’t be able to focus on the dark sky.
TRIPOD IS A MUST due to the long exposure, and I would also consider using a remote or your 2 second timer to elimindate any possibility of camera shake.
LOCATION/TIME
You really need to find a nice dark place to shoot them. Get out of the city, as far away from the light pollution as possible. If you have a location with a big lake, or mountains, that would provide some nice possibilites.
Most likely they will occur later in the evening, 11pm-midnight. But keep checking the skies to see!
You can also keep tabs on the activity by following the Aurora Alerts twitter account.
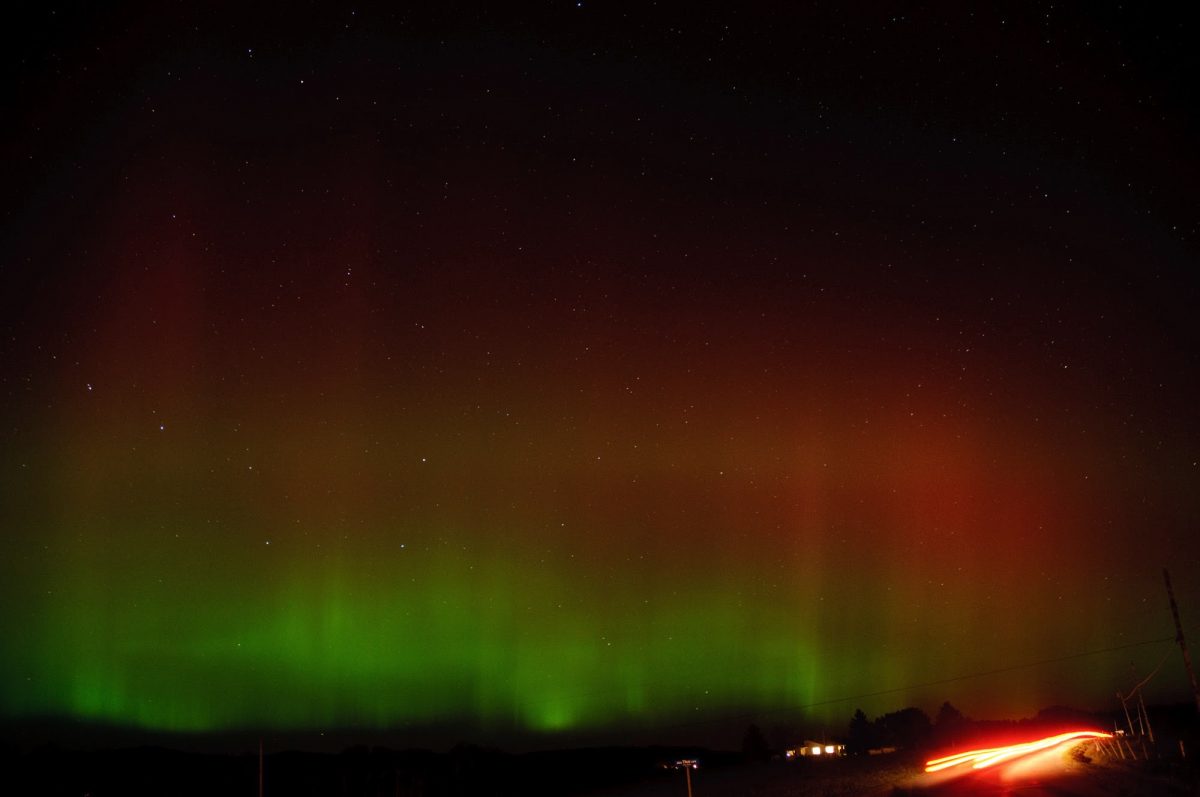
As I was shooting, I heard a car coming, so I recomposed to get more of the road and was able to get the taillights of the car (although they are a bit too bright…but usually I shoot them at F16/F22, which would have meant no Northern Lights most likely)
MORE TIPS BELOW!
I hope you find these tips useful! If so, it would be awesome if you would check out my LearnPhoto365 Photography Assignment Generator Apps on the app store and the Google Play store, a unique photography app that's meant to inspire you to take great photos!
 Perfect for anyone taking part in a Photo 365 challenge, there are over a hundred individual assignments and hundreds of thousands of potential random ones. Versions available for both iOS and Android including free versions so you can try them out! Full details, including reviews and tour videos of the apps can be found at www.learnphoto365.com/apps Even if you only download the free version that would help get it up the app store lists!
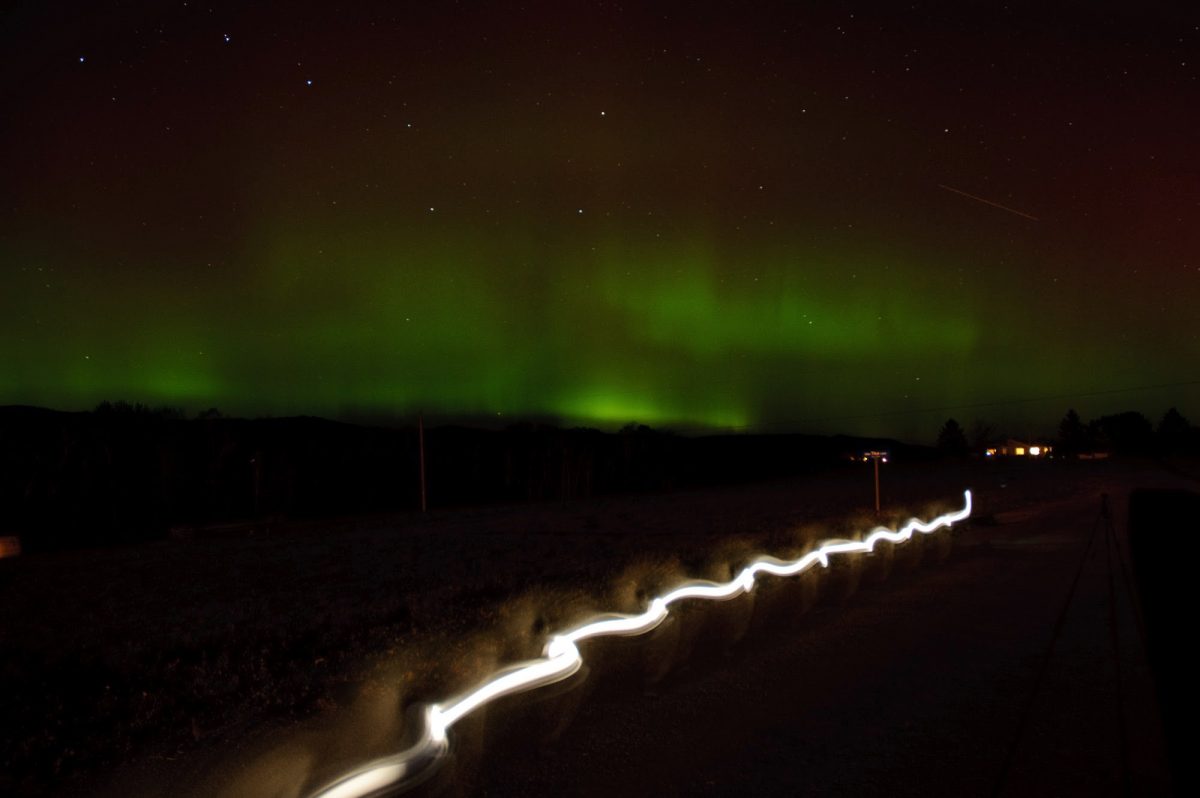
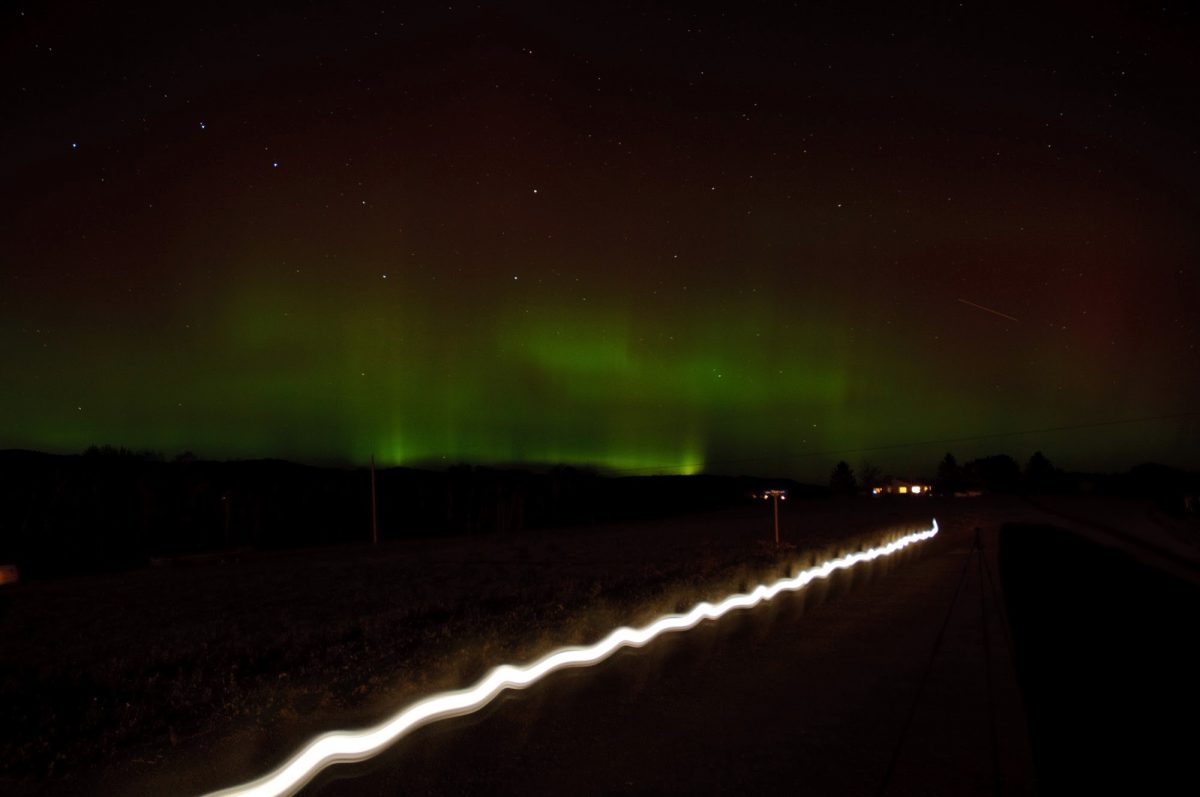
Then I thought it might be fun to play with an LED lantern I had, so I walked down the road with it during the exposure. By this time, the reds in the sky are fading, but the greens are still growing strong. There are lots of ways to be creative with this. You could do neat things using a flash and firing it off camera on a person or yourself…maybe try some sparklers, flashlights, etc.
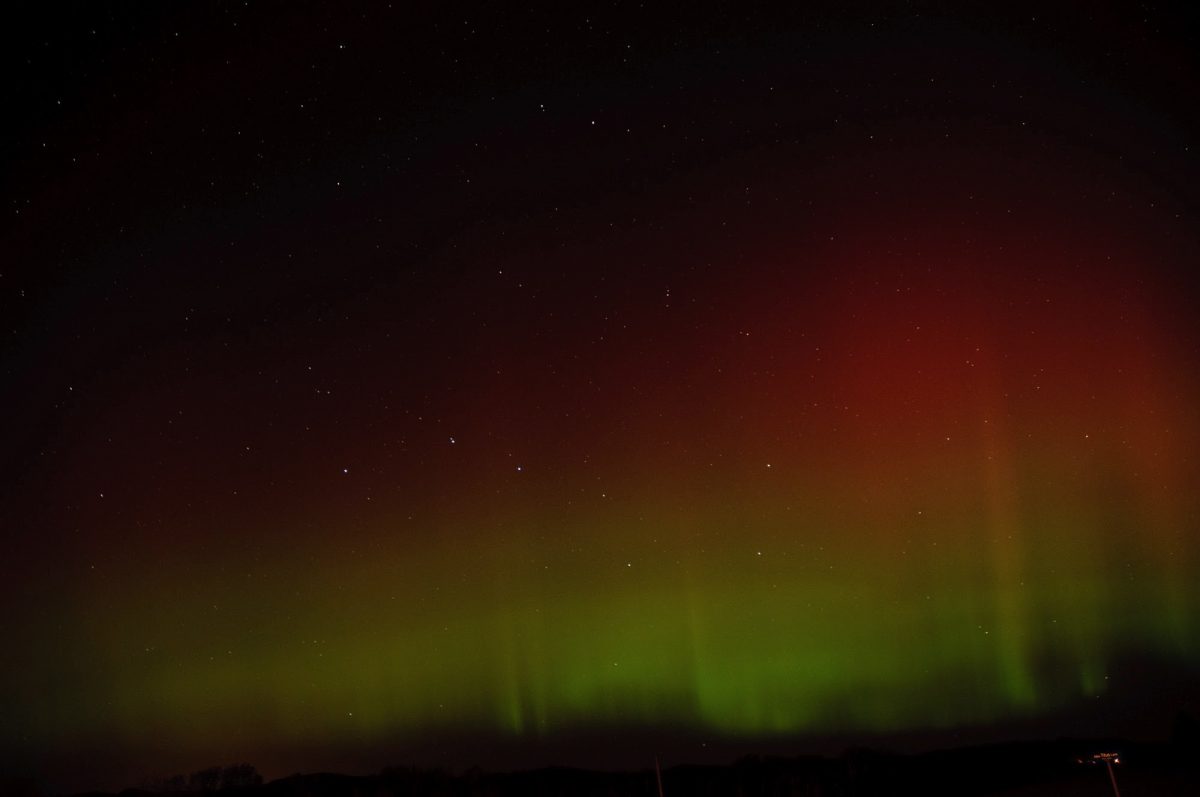
Then it sort of dissipated completely…so I focused on my original task of meteors.
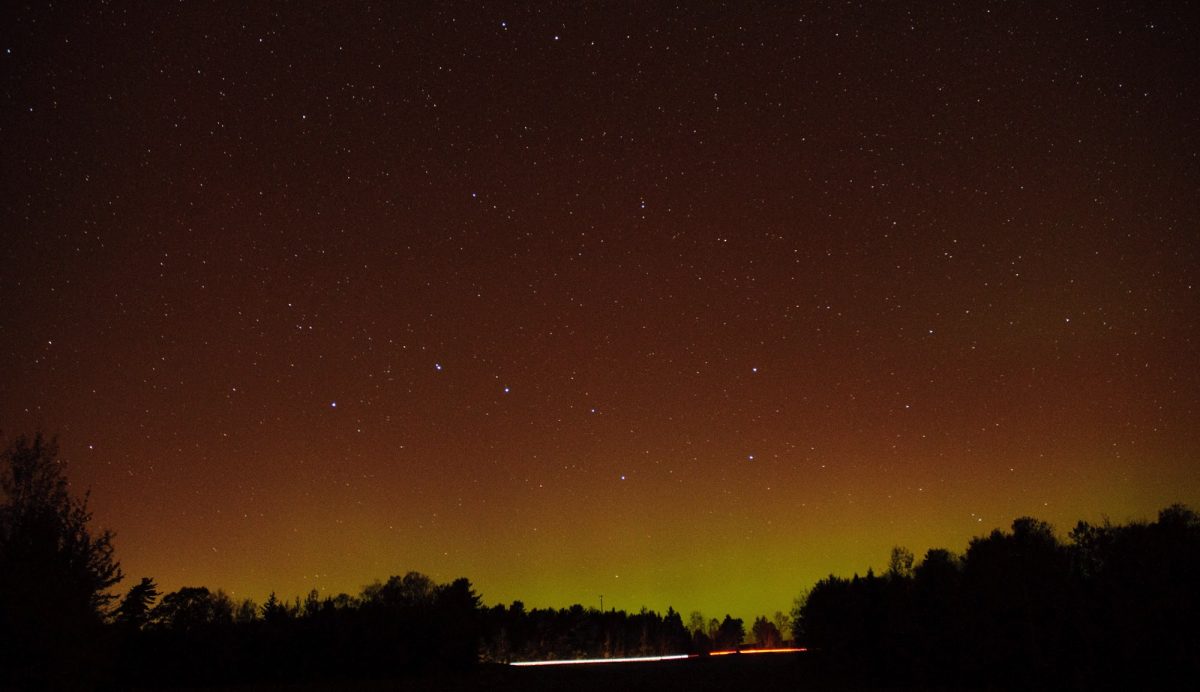
As you can see, there was still lots of ambient light left over from the Northern Lights, so it kind of colored the horizon. And like what happened the last meteor shower…no meteors came through where I had the camera pointed. Ugh. Saw lots of em though.
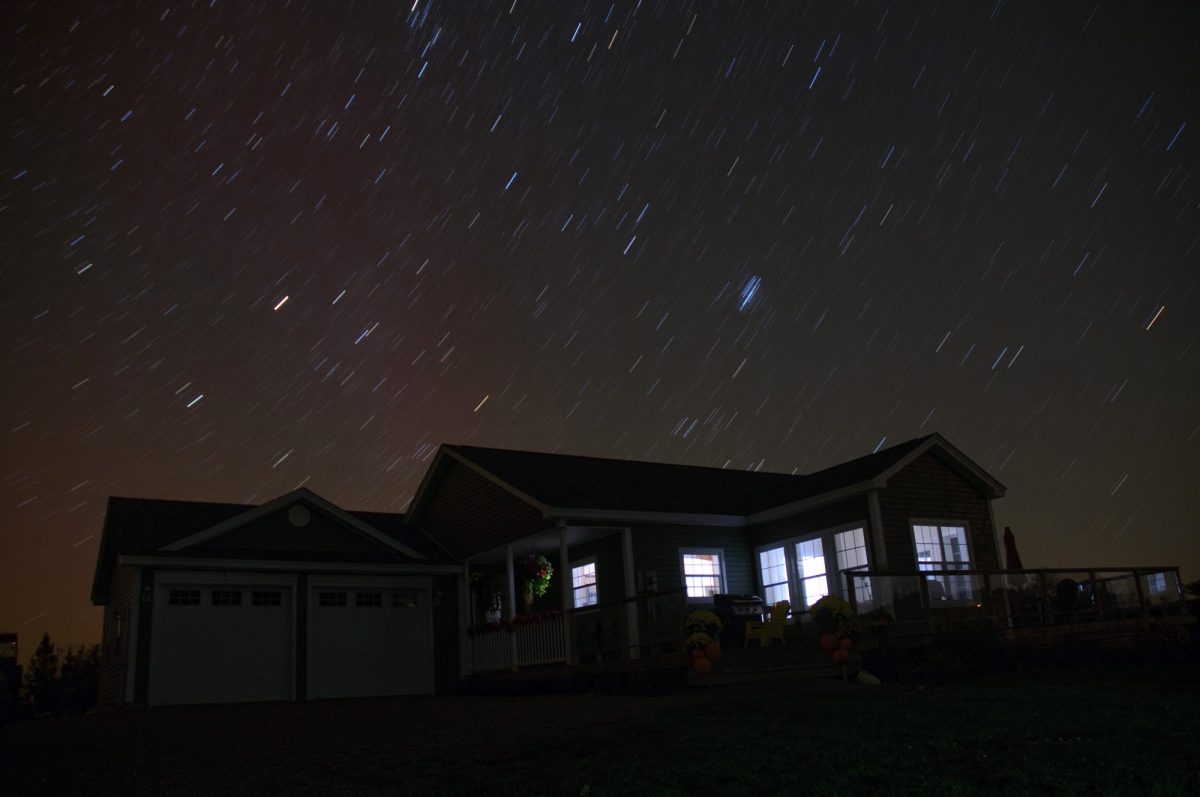
Just to break things up a bit, I thought I’d try some long exposures with a nearby house.
5 minutes, F3.5 gave me the interior light and some of the ambient on the house, along with some blurring of the stars. No wacky horizon color, as I have switched directions, now facing East.
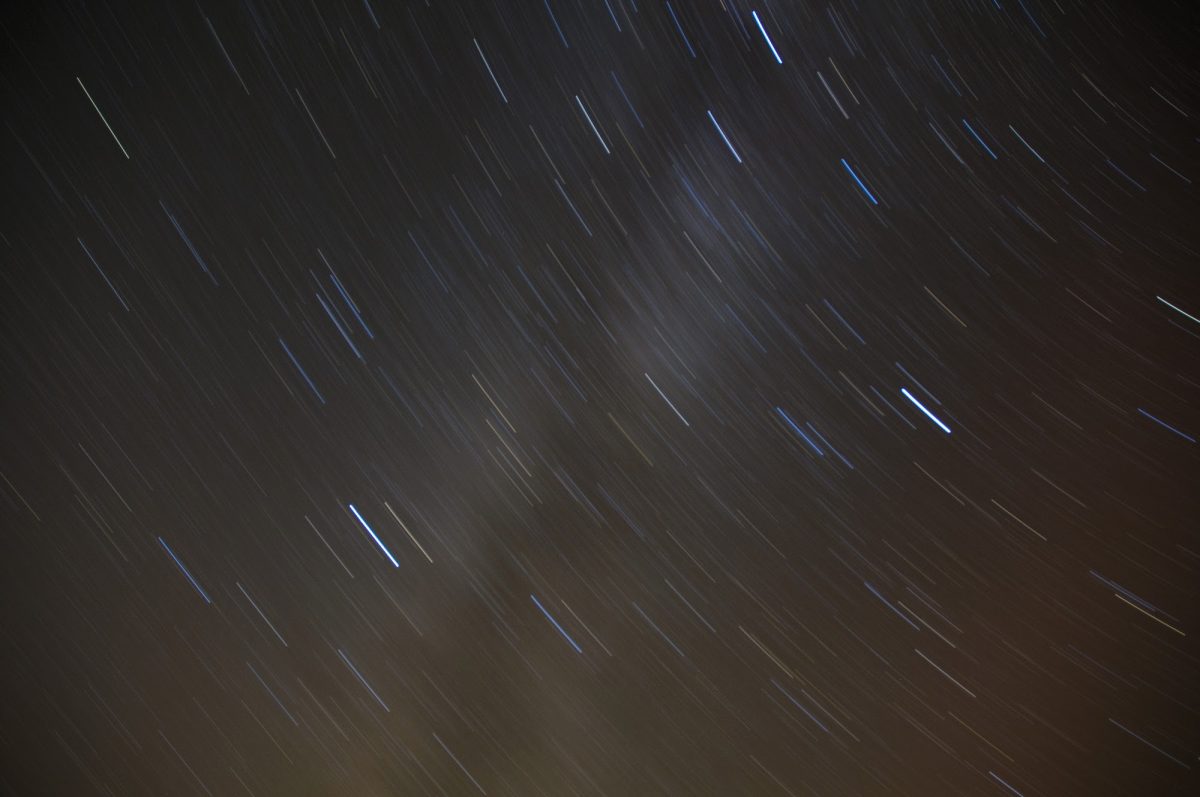
To end off, I did a nice 20 minutes shot of the stars…but no meteor came though…
Why not try some of your own night sky images?
Start with ISO 400, smallest aperture number (F3.5 or lower) and use BULB and do long exposures of the stars.
Want to make sure you get all the latest posts and info? Subscribe!
Noel Chenier
———-
Photographer and teacher
Connect with Noel on INSTAGRAM or TWITTER or via EMAIL
Photography Assignment Generator Apps now available on the app store!
Noel’s Portfolio
Work Done by My Students!
More Photo Tips
How To Photograph The Perseids Meteor Shower

How To Photograph Fabulous Fall Leaves
How To Photograph The Super Moon

Some St. Patrick’s Day themed assignments for you

Photographers: Stop Being The Person Who Is Never There In Your Family Photos
(1043)
18 Trackbacks