
So for many of us it’s two weeks into being stuck at home by ourselves (or with the kids) due to the Covid-19 Corona Virus pandemic…are you getting kinda squirrelly?
Figured I’d help out and start giving out some suggestions and ideas for keeping yourself busy with your photography during this difficult time. So here’s my first post, a reprocessing your old images challenge!
Alright. We aren’t really supposed to go anywhere, so it’s limiting what we can do in relation to taking photographs.
So now is the perfect time to go back into your archive and try some new processing ideas on your images.
For my first reprocessing challenging post, I’m going to focus on converting to black and white in Photoshop.
For this, we will be working with RAW files in Camera Raw. Don’t shoot RAW and only have JPEGS?
That’s okay! You can actually open up JPEG’s in Camera Raw! Most of the commands aren’t going to work exactly the same as if you shot the image originally in RAW, but the black and white conversion works just fine.
To open up a JPEG image in CAMERA RAW in Photoshop CC (scroll down for instructions in Photoshop Elements)
1. Select FILE->OPEN in Photoshop
2. Browse and find the image you want to open
3. Under FORMAT, change it from JPEG to CAMERA RAW
4. Then click OPEN and it should bring it into the CAMERA RAW plug-in window
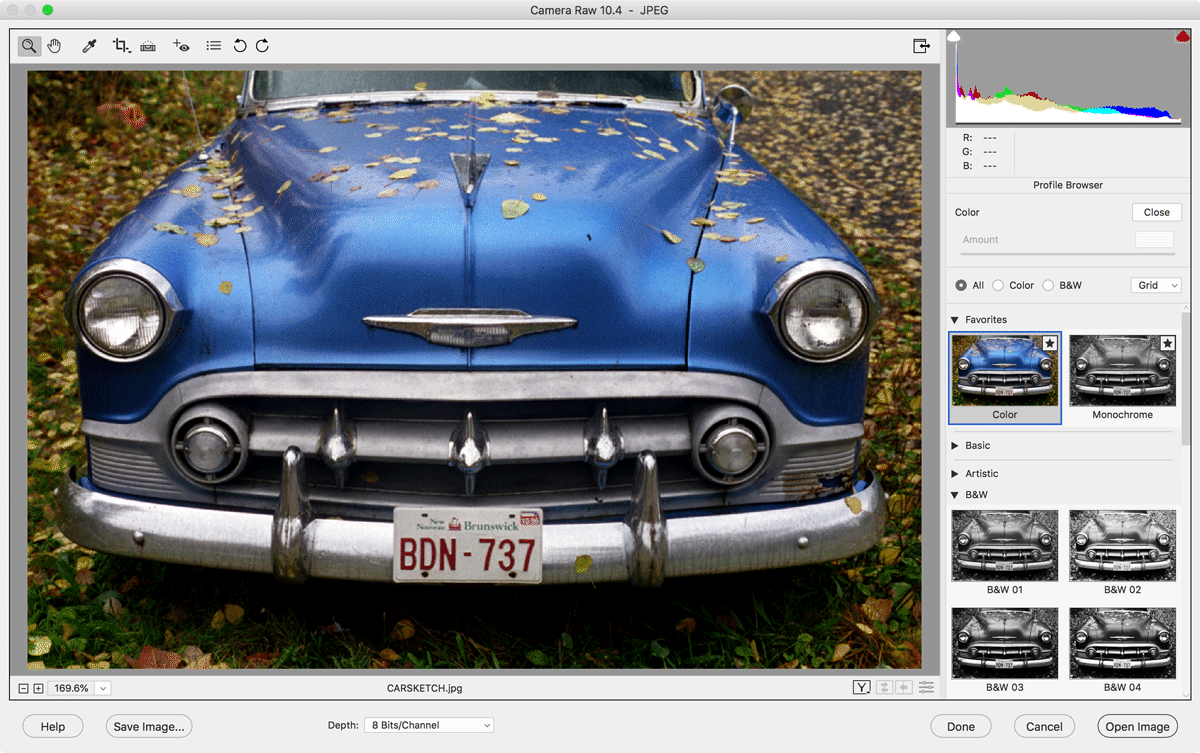
WORKING WITH RAW FILES IN CAMERA RAW IN PHOTOSHOP CC
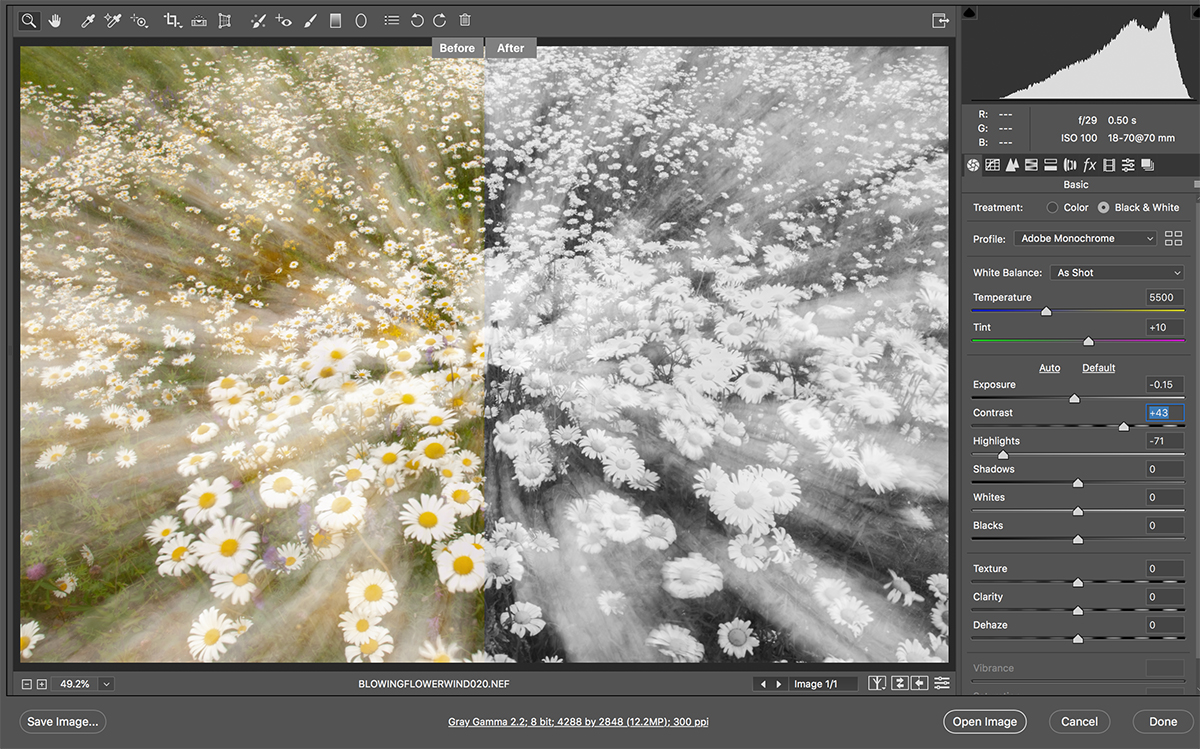
The camera raw plug-in has a built in black and white conversion option.
(Note: Photoshop Elements does not have this tab. So scroll down to see suggestions for Elements.)
Under the BASIC tab, select BLACK AND WHITE for TREATMENT. The image will be converted to black and white.
But of course, that is just a basic conversion. You want more control over how the image gets converted.
So switch over to the 4th tab, called BLACK AND WHITE MIX.
This tab gives you access to colour sliders that allow you to affect how each colour get converted to black and white.
Moving a colour slider to the positive will brighten those colours and other colours that contain it.
Moving a colour slider to the negative will darken those colours and other colours that contain it.
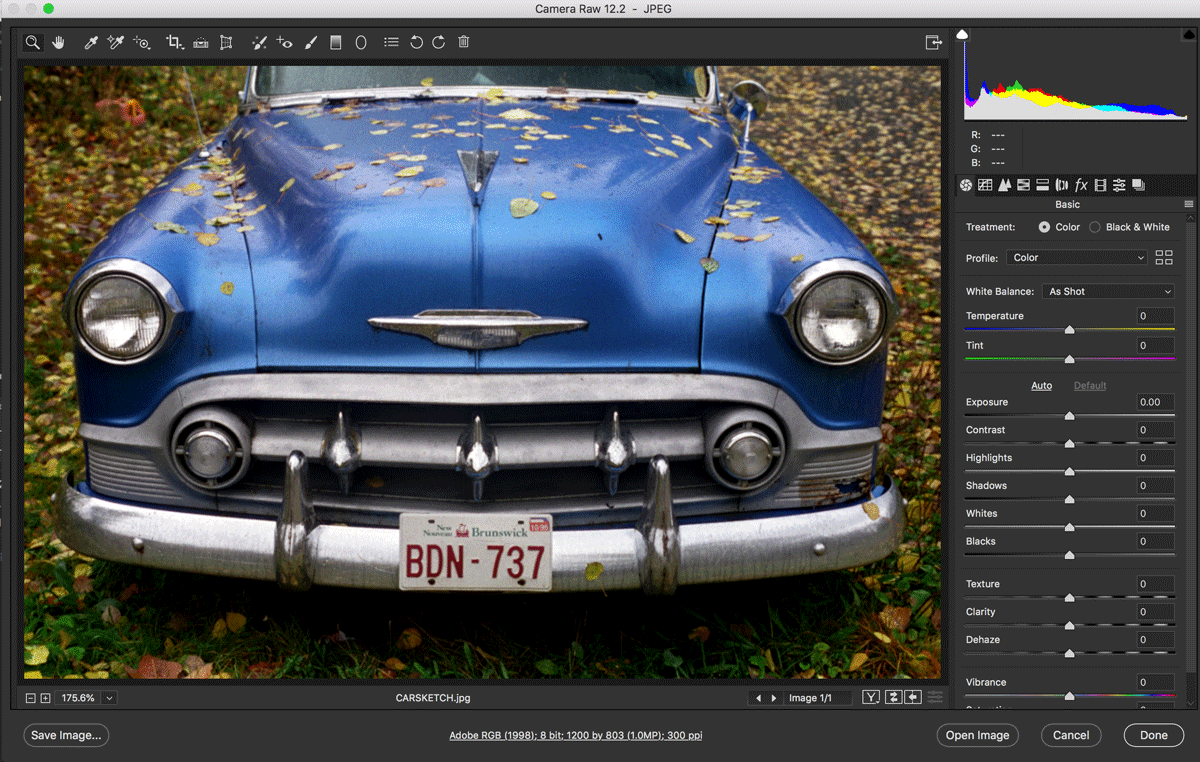
As you can see in the example below, the blue of the car and the leaves on the ground can be lightened and darkened in different combinations for different looks.
Some suggestions:
You can make a particular colour of flower stand out from the rest, or adjust the tone of foliage.
For example in the image below, adjust the green sliders make the foliage go lighter or darker.
Adjusting the orange/red/yellow affect the door and the brick tones.

For the image below, adjusting the yellow/green sliders change the tones of the siding.
You can darken blue skies or water by lowering the blue and aquas slider, which will give you an effect similar to using a red filter with film in the pre-digital days.

Note that with this technique, you have to be careful not to go too far with it. If you do, you can sometimes get white lines around the edges. Especially if you are adjusting opposite colors.
Next I’m going to show you had to make it really look like black and white film by adding some grain.
MORE TIPS BELOW!
I hope you find these tips useful! If so, it would be awesome if you would check out my LearnPhoto365 Photography Assignment Generator Apps on the app store and the Google Play store, a unique photography app that's meant to inspire you to take great photos!
 Perfect for anyone taking part in a Photo 365 challenge, there are over a hundred individual assignments and hundreds of thousands of potential random ones. Versions available for both iOS and Android including free versions so you can try them out! Full details, including reviews and tour videos of the apps can be found at www.learnphoto365.com/apps Even if you only download the free version that would help get it up the app store lists!
TAKING TO THE NEXT LEVEL: GRAIN
Now, if you really want to make it look like an old-school black and white, you can add grain to the image.
Hit the FX tab, and then adjust the sliders to add a grain effect you want.
Obviously play around a bit, but here are some suggestions:
If you are looking for a subtle grain, like a nice ISO 100 film, try 25/25/25.
Looking for that TRI-X look, 50/50/50.
Want to go full ISO3200 grain the size of golfballs? Crank er! 100/100/100.

Once you have the image looking the way you want, you can select OPEN IMAGE to bring it into Photoshop for more tweaking, or hit SAVE IMAGE to export it as a final JPEG.
CONVERTING TO BLACK AND WHITE IN PHOTOSHOP ELEMENTS
Photoshop Elements has a lot of great features, and Adobe has continually updated it and made it better so that for most photographers, it’s all you need. Another plus is that you can actually purchase it outright and not be forced to subscribe…as of now. For $80-$140 (depending on sales) it’s a great deal. The only time you’ll need to upgrade is when you buy a new camera and your version no longer supports it. That being said, it doesn’t have the black and white conversion in it’s version of camera raw.
But there are ways to adjust your black and white conversion!
WORKING IN CAMERA RAW IN PHOTOSHOP ELEMENTS
While it doesn’t have the black and white conversion tab, you can make some adjustments in the Camera Raw plugin box.
To open an image (raw or jpeg file) in Camera Raw, select FILE->OPEN IN CAMERA RAW.
In the BASIC tab, select PROFILE, and choose BROWSE.
Check the circle next to B&W, and then open the B&W options below by clicking the small triangle.
You will then see a group of thumbnails of various presets showing a thumbnail of how the effect will look on your image.
If you hover your cursor of them, it will show a full preview on your image.
Click on the treatment you want.
Then you can adjust the AMOUNT by moving the slider.
When you are satisifed, click CLOSE.
You can continue to adjust the tones by adjusting the white balance, and adjusting the other sliders you have access to.
When you are happy with your conversion, click OPEN IMAGE to bring it into Photoshop Elements to continue editing, or SAVE IMAGE to save a final version.
So those are so ways to try a new look for your photographs! Hope you have fun experimenting. |
If you have any questions, don’t hesitate to contact me!
And if you know of anyone who’d might find this useful, please share it with them!
Want to make sure you get all the latest posts and info? Subscribe!
Noel Chenier
———-
Photographer and teacher
Connect with Noel on INSTAGRAM or TWITTER or via EMAIL
Photography Assignment Generator Apps now available on the app store!
Noel’s Portfolio
Work Done by My Students!
More Photo Tips
PHOTOGRAPHY WORDLE 1
Here is today’s photography wordle. It could be a digital or film photography-based term…a historic process…even an equipment or photography company brand name! If you want to get updated when I post a new one, you will need to register for a free acount HERE. Then you can go to …Photo Bits May 10th 2016
Icebergs always make for great images…but look at how amazing they look when they have flipped upside down! [ms-protect-content id="2044"] Sorry! As s a free member, you only get one link. One of the perks of the PREMIUM membership! Sign up here [ms-membership-buy id="1885"] Here you can see what a …Zelda Halloween Costume
Well, I had fun with making this and some good comments, so I’d thought I’d post a bit about it. My son Gabriel is a big fan of retro gaming…he loves anything old. So we have a Sega Master system, Super Nintendo, Game Boy Advance, and of course lots of …Photo Bits Mar 15th 2016
Over 14,000 images from the Apollo missions have been put on Flickr. One small step for man, one giant leap for photography! [ms-protect-content id=”2044″] As a free member, you only get one link. The remaining links would be hidden from you. One of the perks of the PREMIUM membership! Sign …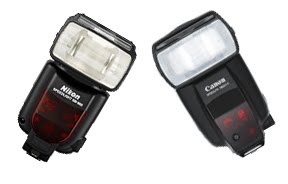
Flash and Accessory Buying Guide (Updated 2023)
If you are looking to add a flash or two to your collection, here are some options for your Christmas list… (729)
(424)