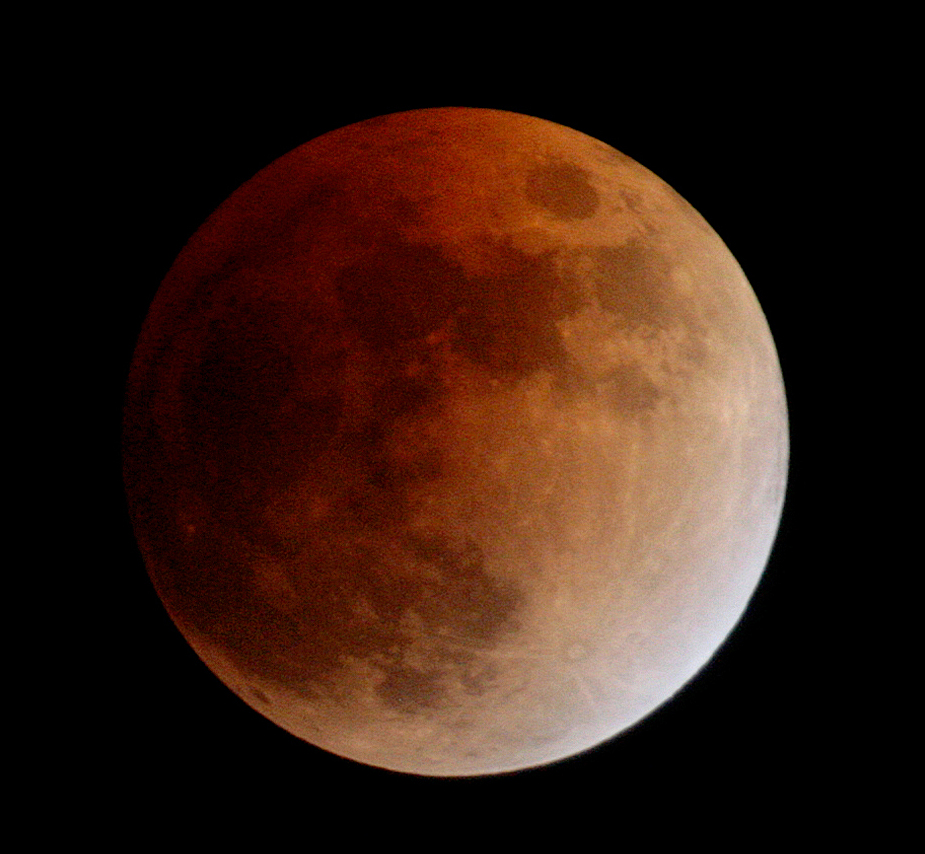
A super awesome lunar eclipse is happening late Sunday evening May 15th into Monday May 16th
North and South America are the prime viewing areas and will be able to witness the entire event, but those of you in Europe, Africa, will be able to see some of it. (Sorry Asia/Australia, ..you are sitting this one out!)
If you are lucky enough to be in the prime viewing areas however, here are tips on how to photograph the lunar eclipse!
WHERE AND WHEN:
Want to find out if the eclipse will be visible and what time it starts where you live? Try timeanddate.com.
For those of you in New Brunswick, the eclipse will begin shortly after 10:30pm (Atlantic time) on the 15th.
Full eclipse will be just before12:30am. It will end just before 4am. So if you want to cover the full thing…it’s going to be a long night!
It’s best to find the moon BEFORE the eclipse. If you get out when the moon is covered, it will be hard to see.
In that event, try some test exposures with a wider lens and the moon will show up on the camera, then you can refocus.
Another option is to use an app like Sky View (free for iOS or Android) or Sky Guide (paid for iOS) to find it’s position.
WHAT LENS TO USE:
You want to use your biggest zoom lens, but even with your 300mm it won’t get the moon very large in the frame. So you will have to crop in. Make sure you have the camera set to it’s maximum megapixel/image quality. A 150-600mm/200-500mm lens is much better for this.
If you have VR (Vibration reduction) or IS (Image stabilizer) switch on your lens…TURN IT OFF! It can actually CREATE motion blur sometimes when you are on the tripod….
If you are considering creating an image showing each phase of the eclipse in the same frame, you most likely will want a short lens like 50-70mm.
RELATED: HOW TO CREATE A LUNAR ECLIPSE COMPOSITE IN PHOTOSHOP
TRIPOD?:
Of course. You will be doing a very long exposure! But even with the faster exposures as the eclipse starts, doesn’t hurt to have the camera on the tripod to keep it where it needs to be pointed.
Remember, the Earth is going to rotate, so the moon will move out of your frame. Be careful to keep track of it before it’s totally eclipsed, or you might lose the moon! If you do lose it, just go to a wider view and do some long exposures to find it again.
You could also keep the camera at the same point leaving lots of space for the moon to track through, and photograph the different positions of the moon in as it moves across the sky, and put that together as one image in Photoshop.
SHOOTING MODE:
You have to be in MANUAL MODE(M)
ISO:
I’d suggest 400 ISO so you don’t have to use extremely long exposures. You don’t want the Earth’s rotation to soften your moon.
WHITE BALANCE:
Daylight, since the moon is reflecting the sun of course…but you might want to try cloudy/overcast or shade once the eclipse starts. You could also shoot RAW and adjust later.
FOCUS:
Manual focus. AF most likely won’t be able to pick up the moon, especially during the eclipse.
EXPOSURE:
The exposure is going to vary based on what degree of the eclipse you are shooting.
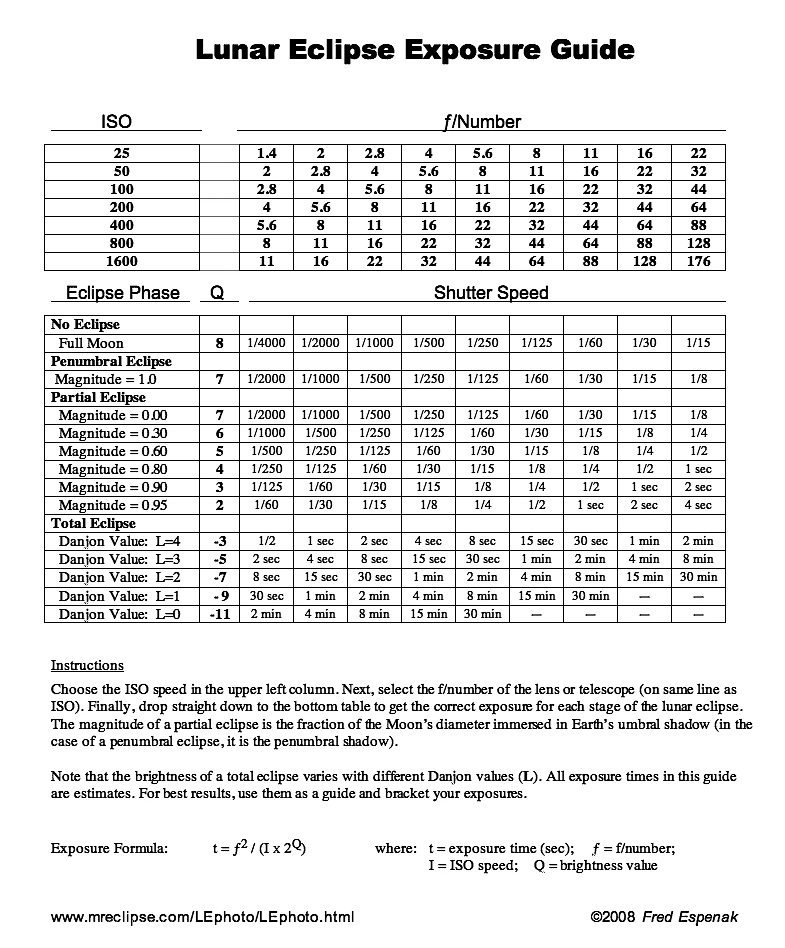
You can start with the “sunny 16 rule” by choosing a shutter speed equal to the ISO, and using F16 as your aperture to get a nice shot of the moon before the eclipse starts, then use this handy chart from Mr Eclipse.com as the eclipse begins.(a great resource for solar and lunar eclipse photography!)
Find your ISO, choose the aperture, and use the shutter speed that lines up below based on the various stages.
For example, ISO 400, F16, at fully eclipsed, the shutter speed would be 30 minutes. However, that will probably result in a very blurred image that will be caused by the Earth’s rotation.
You may want to use a much wider aperture (f5.6/F8) during the full eclipse stage and bump up the ISO to get the shutter speed up a bit.
COMPOSITION:
Since the moon will be small, you may want to find other elements you can put in the frame to fill it in. A sign, a church steeple, things like that where you can stand farther back and zoom in on.
OTHER TIPS:
-If you shoot the moon at various times, you can put the images together like the montage above. Here’s a tutorial on how to do this in photoshop!
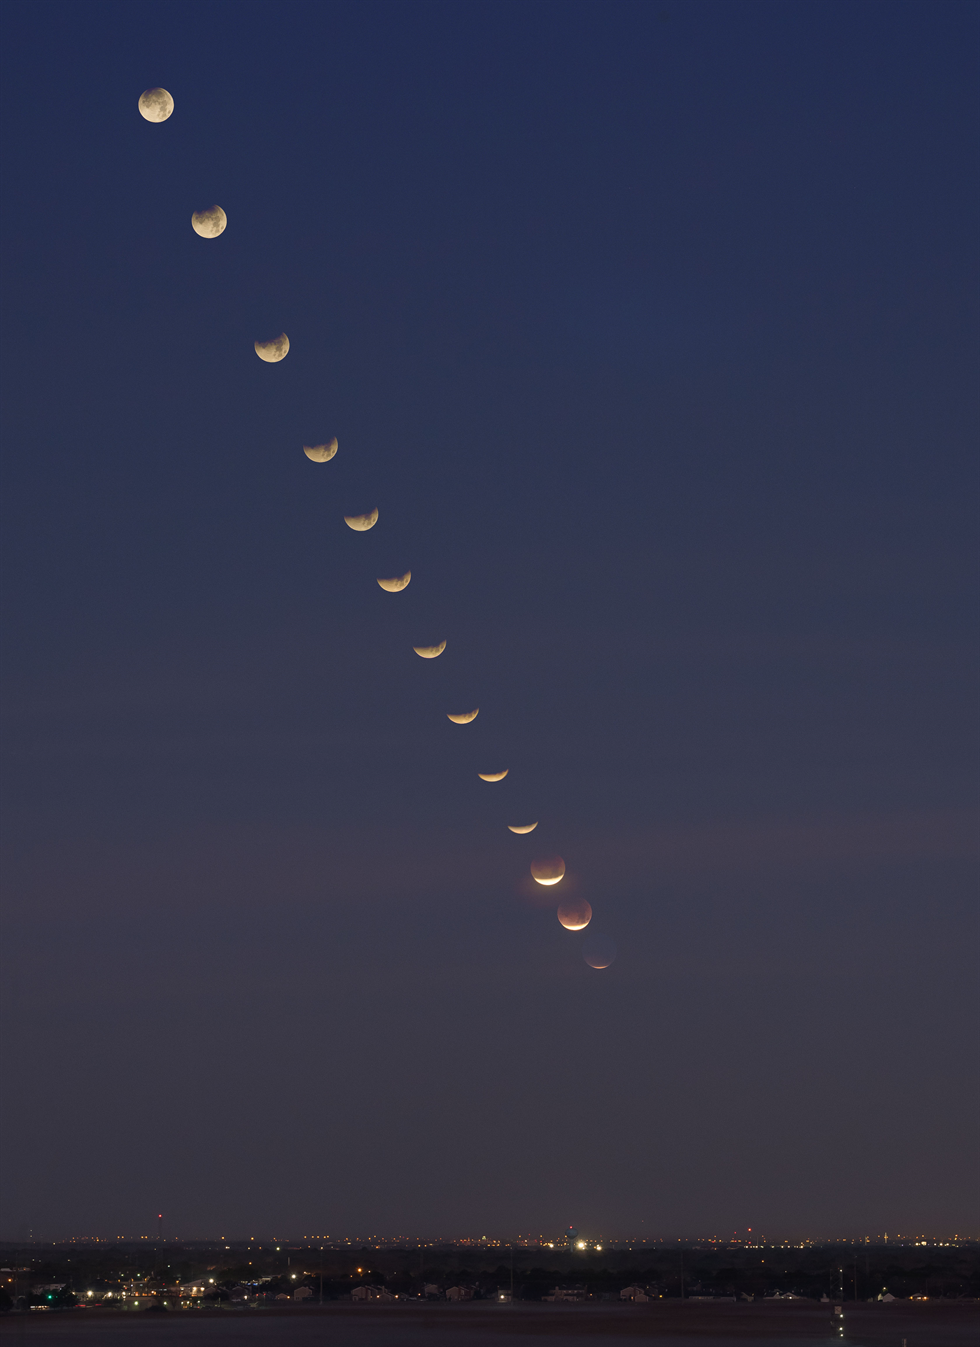
Used under Creative Commons license
-If you want to include the landscape in your composition, use a smaller lens so you can record the landscape in the frame, then you can composite the various phases of the eclipse into the frame in Photoshop, as shown above. Here’s a tutorial on making the composite!
-If it’s a chilly night, you might want to pull the battery out in between shots. The cold will drain the battery. Also, you may want to put the lens cap on in between shots to prevent condensation. Before you do, move the moon to the bottom corner of the frame so when you come back, it should be near the middle again!
Hope you find these tips useful, and wherever you are you get clear skies!
If you have any questions don’t hesitate to ask!
Noel Chenier
———-
Photographer and teacher
Connect with Noel on INSTAGRAM or TWITTER or via EMAIL
Photography Assignment Generator Apps now available on the app store!
Noel’s Portfolio
Work Done by My Students!
Want to make sure you get all the latest posts and info? Subscribe!
(275)


