
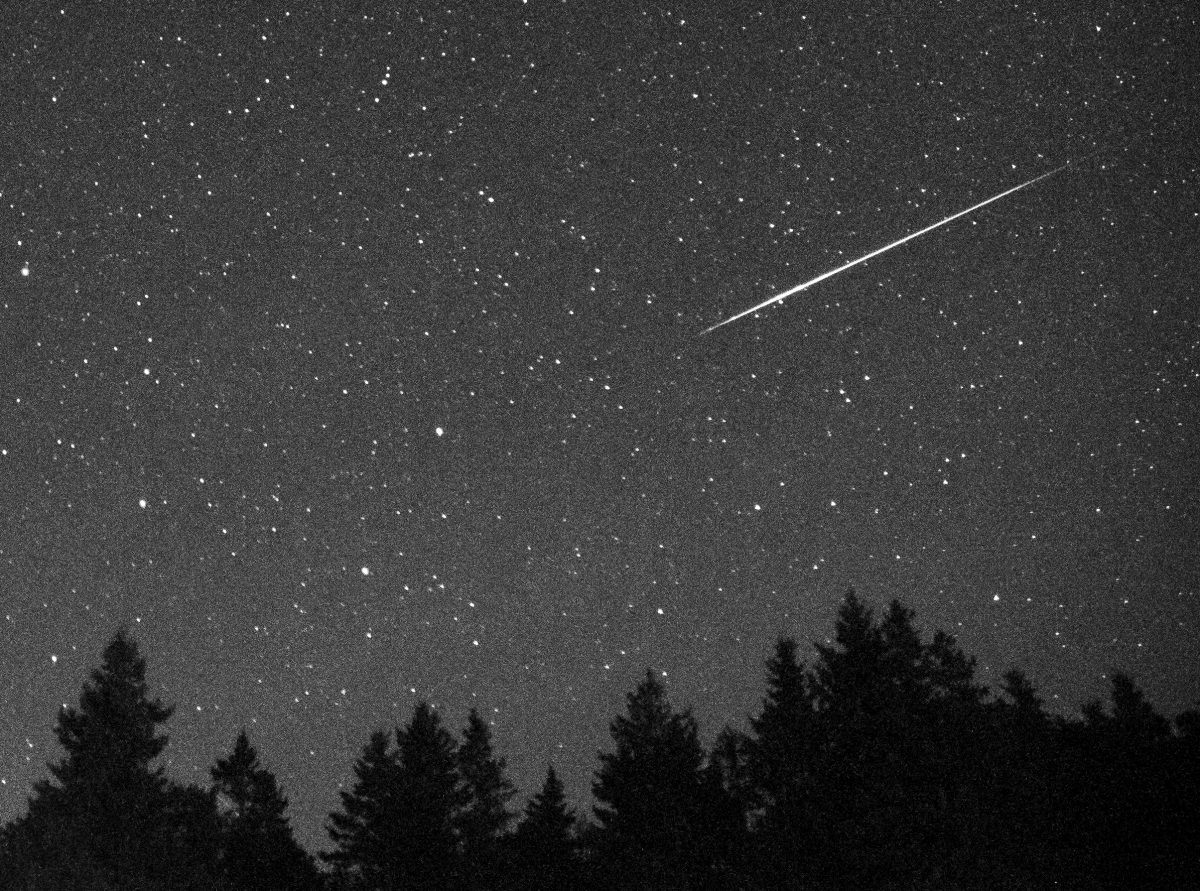
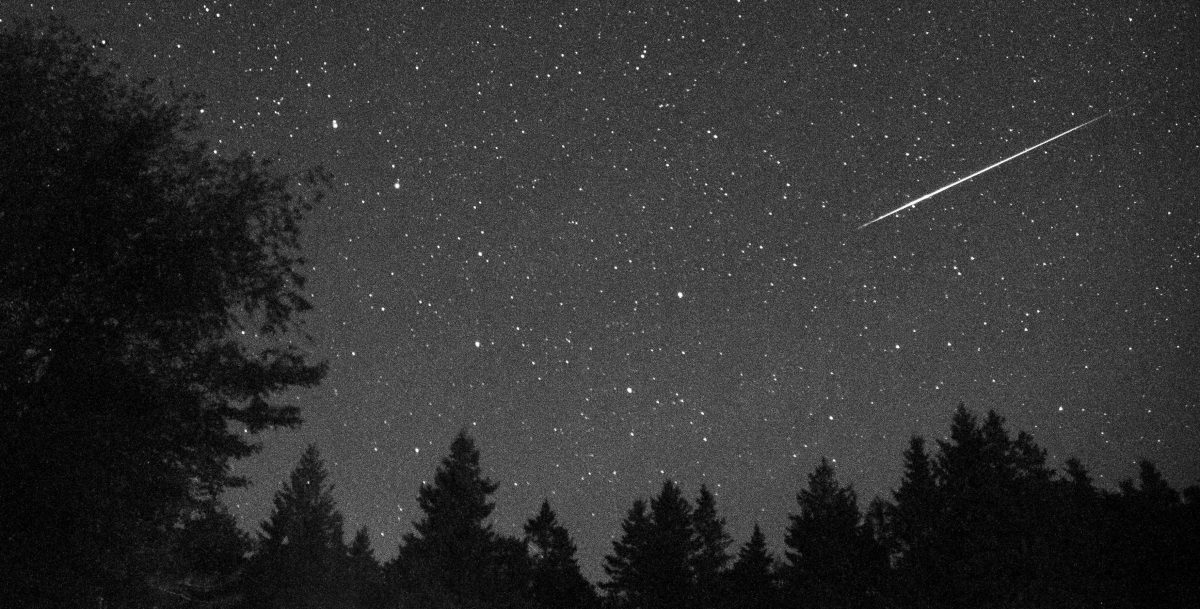
The annual Draconids Meteor Showers is peaking this week the night of October 8th! It’s not usually a very plentiful shower…but it can roar when you least expect it!
So get out your tripods, grab a coffee, and go shoot them! Here’s some tips on how!
Pre-Shooting Preparation:
Charge your batteries fully before going out. It might be a bit colder at night, and that can affect battery life. Wear some warm clothes, a hat, and gloves. Bring some hot beverages, some friends, and make it a fun outing! At least you’ll have someone to talk to between exposures.
Also bring a flashlight or LED keychain light so you can see what you are doing when changing your settings. A headlight looks dorky, but it let’s you works with both hands.
Time to Go Out:
Unlike most meteor showers, the Draconids are best BEFORE midnight. So head out once the sun has set and the sky is getting nice and dark! October 8th is the peak night, but you can still see them from the 7th to the 9th.
Where to Go and Sky Conditions:
You want to be as far away from the City/Town as possible to reduce the amount of light pollution. Find a dark road out in the country somewhere far away from street lights.
Obviously it has to be a clear night that you can see the sky. The moon will be setting, so it won’t interfere with seeing the meteors.
Finding the Meteors
You should be able to see lots of meteors looking to the Northwest, they will radiate from above the big dipper. Another great way to find the constellations is using an app like Sky View or Sky Guide.
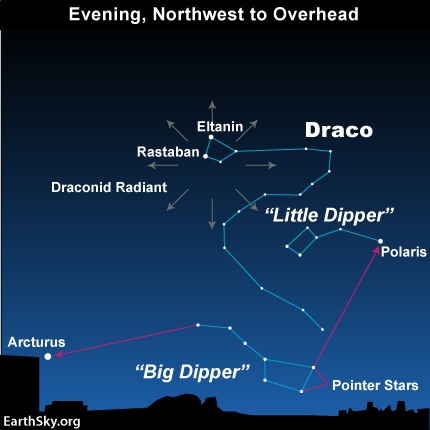 |
| Graphic from www.earthsky.org |
For more info on the Draconids, check out this article on EarthSky.org.
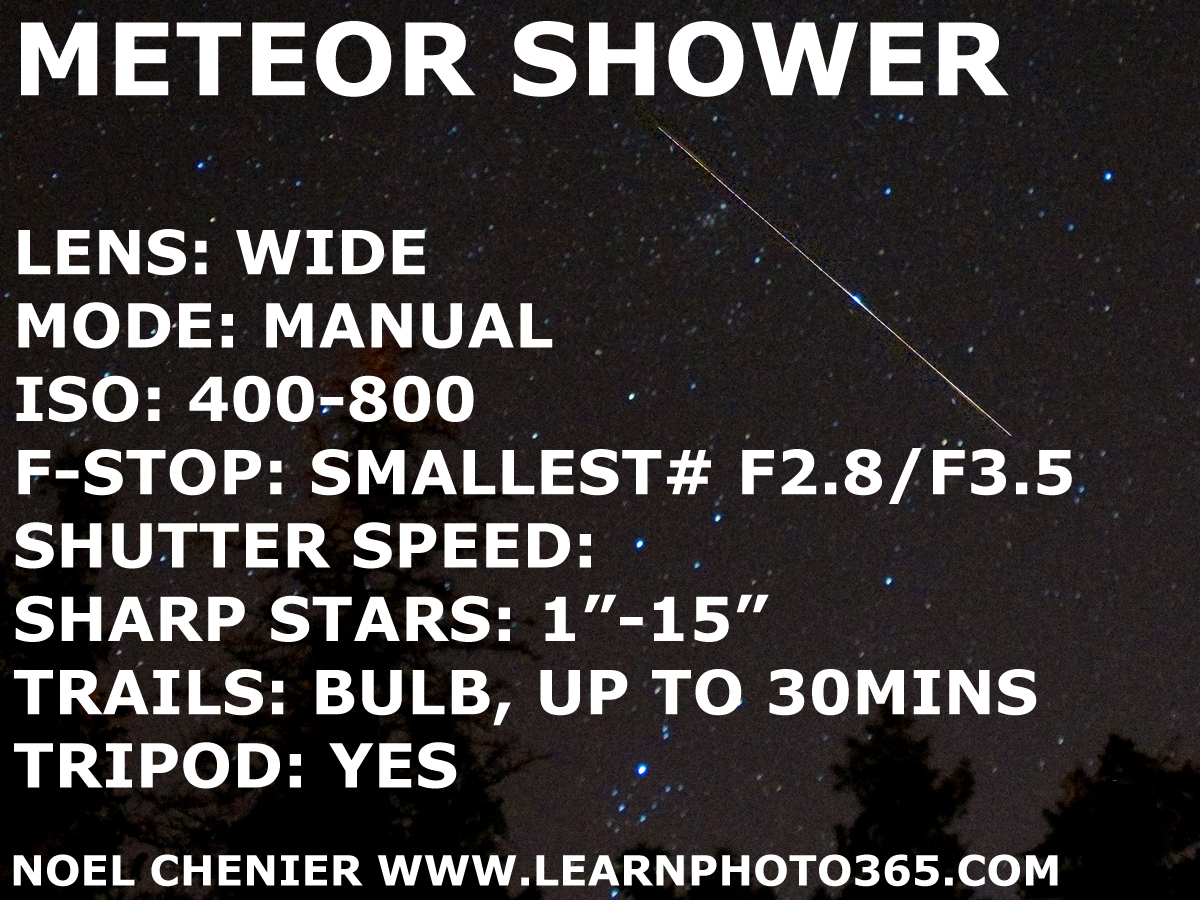
Do I Need A Tripod?
YES and the heavier the better!
ISO:
If you have a wide aperture lens (F18-F2.8) start with 400 ISO and see how much detail you can pick up. If you aren’t getting enough details or don’t have a wider aperture lens, start with 800 ISO and then go higher if necessary.
Lens:
You want to use as wide a lens as possible (16-35mm) so you can get a wide range of sky area. in the frame.
MORE TIPS BELOW!
I hope you find these tips useful! If so, it would be awesome if you would check out my LearnPhoto365 Photography Assignment Generator Apps on the app store and the Google Play store, a unique photography app that's meant to inspire you to take great photos!
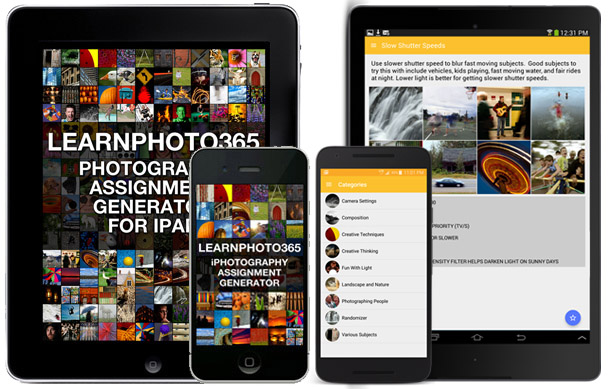 Perfect for anyone taking part in a Photo 365 challenge, there are over a hundred individual assignments and hundreds of thousands of potential random ones. Versions available for both iOS and Android including free versions so you can try them out! Full details, including reviews and tour videos of the apps can be found at www.learnphoto365.com/apps Even if you only download the free version that would help get it up the app store lists!
Shooting Mode: Has to be MANUAL as you need to set the shutter speed and aperture.
Shutter Speeds:
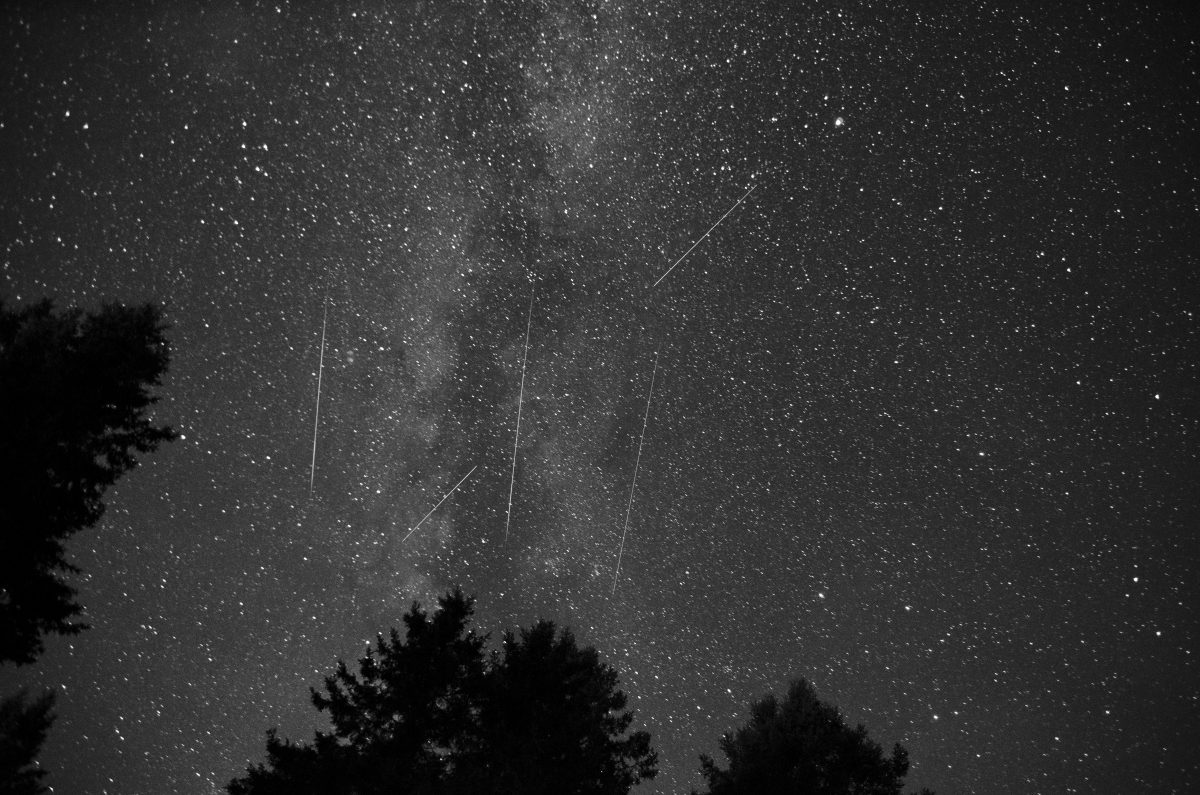
The longer the speed you use, the more meteors you will get. However, if you go too long, the stars will begin to form trails. To figure out how to long to shoot the stars without getting trails, you can use this general guide.
Divide 600 by the length of your lens, and that is how many seconds you should use. For example, if you are using a 17mm lens, 600/17mm= 35 seconds.
Do a test photo, and see if the stars blur. If they do, your exposure is too long.
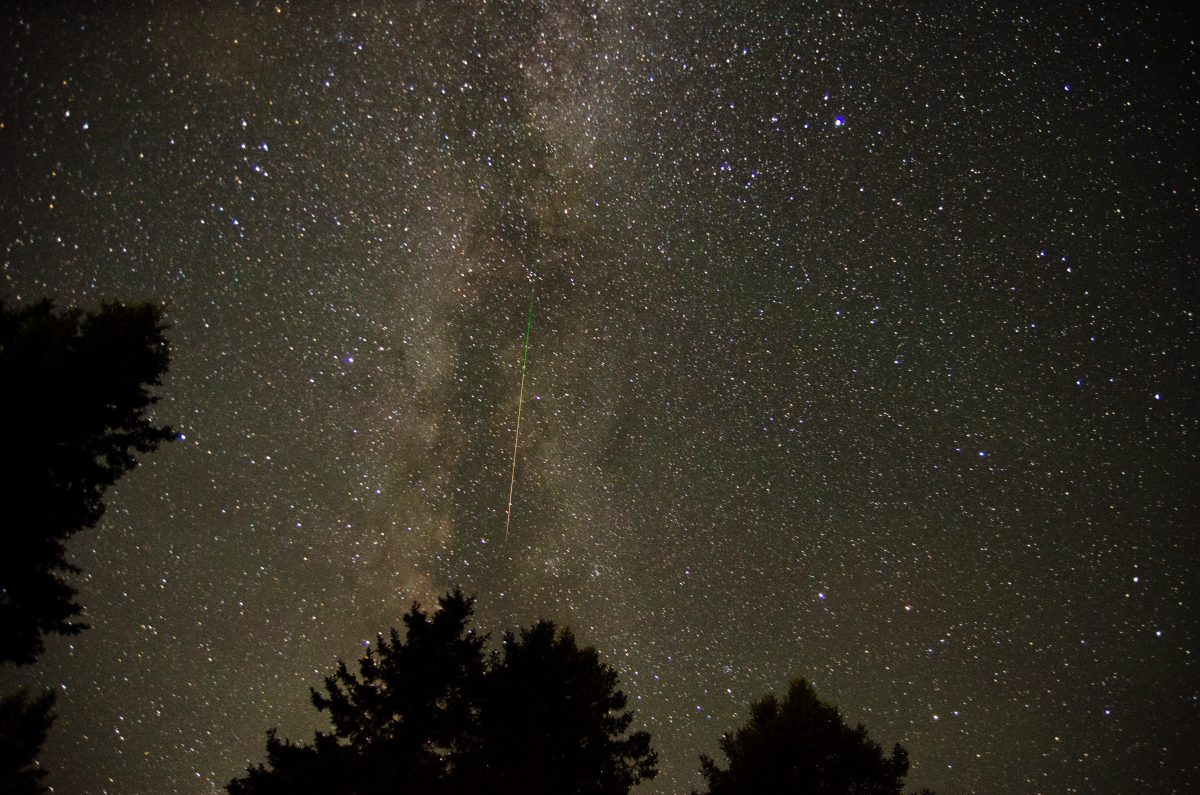
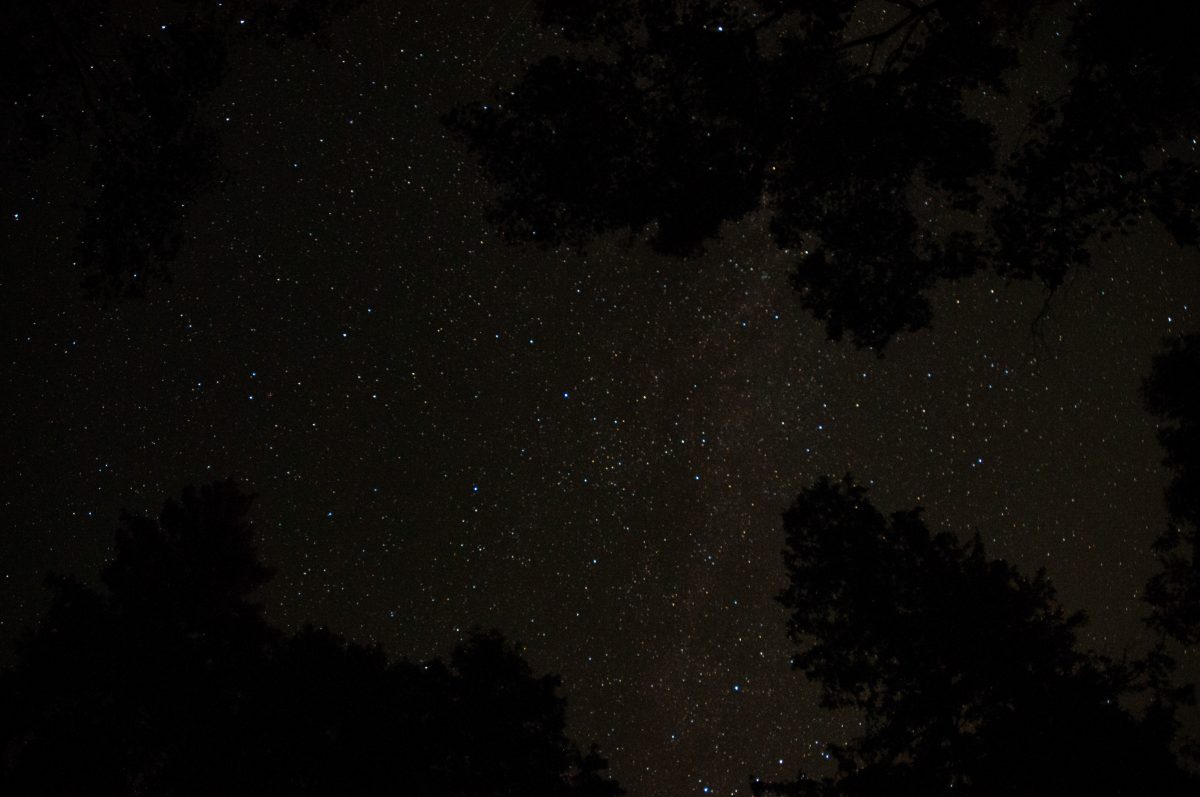
However, if you do long exposures like 30minutes to 1 hour(or longer), you will get star trails that look neat along with the straight lines of meteors. The photo below was done for three hours using a film camera(although you can see the light pollution made the sky brownish instead of black!) Note you will need a cable release or remote, and use BULB mode to do this. No way you can hold the button down for that long…
NOTE: Many digital cameras will max out the shutter length at 30 minutes to prevent overheating and damage..most likely that will be the longest you can do.

Aperture:
Use your widest aperture (smaller number, for example 3.5/4.5) to let in as much light as possible. If you find the meteors coming out a bit bright, you can stop down one setting. If you have a lens that has a really wide aperture(1.8/2.8) that is even better!
Meter:
Forget the meter. It will be waaaaay in the minus, that is fine. The camera can’t meter properly for the meteors, just use the settings above.
Focus:
You have to use MANUAL focus and focus on the stars or set the focus on the lens to Infinity.
White Balance:
I would suggest shooting RAW, and then playing with the white balance if needed.
If you are shooting JPEG, do a test using DAYLIGHT/FULL SUN and see how it looks. If you do have things lit up by ambient light around you(like street lights, etc) you may want to use TUNGSTEN/INCANDESCENT instead, but it could make the sky go a bit too blue.
Combining Shots:
-It’s possible to combine the images of separate meteors into one image using Photoshop. The difficulty is the position of the stars will change as the Earth rotates, so you’ll need to find star clusters that you can use to line the shots up.
Other Shooting Tips:
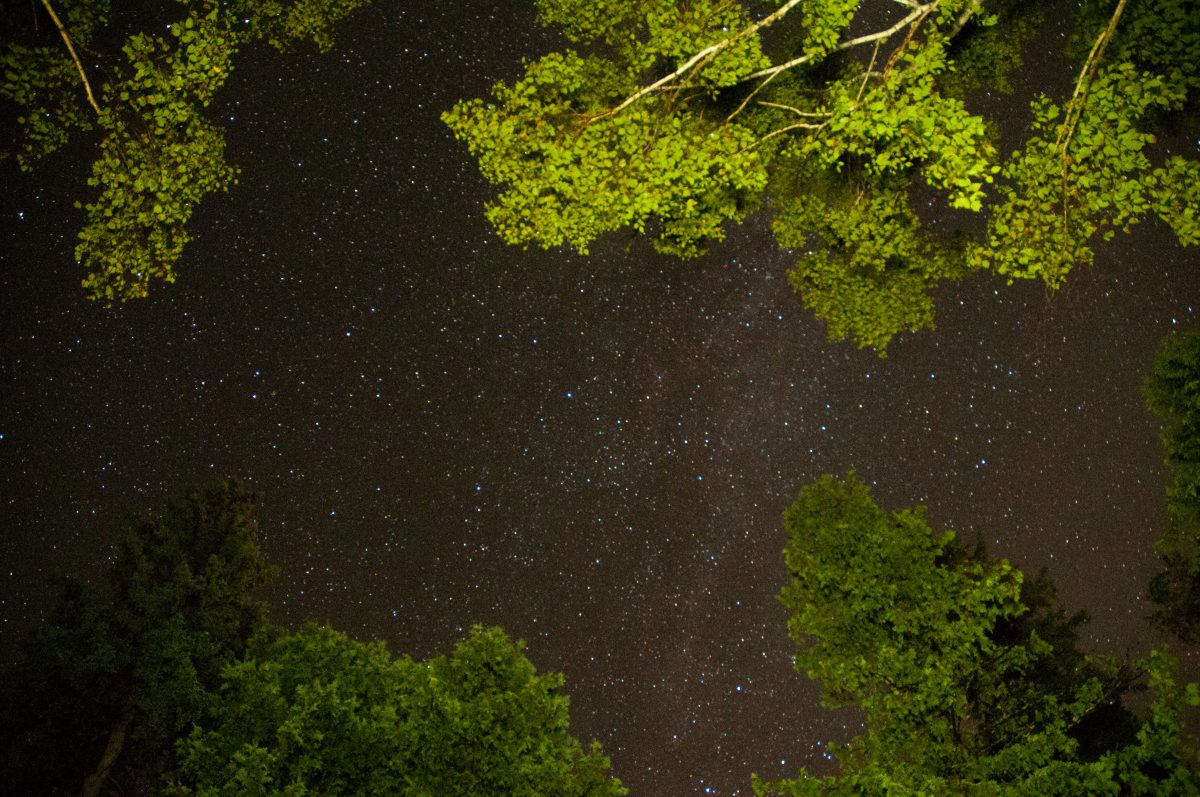
-If you want to include trees, mountains, the horizon, etc they will provide an interesting silhouette shape and scale.
-You could also try using a flash or LED light during the exposure to light up the trees!
-Have an old film camera kicking around? Haul her out, throw in some ISO 400 film, and take some long exposures!(You have to have to use a cable release)
-You may also capture other elements in the sky, like planes or satellites!
So go out there, have some fun!
Hope you get clear skies!
Want to make sure you get all the latest posts and info? Subscribe!
Noel Chenier
———-
Photographer and teacher
Connect with Noel on INSTAGRAM or TWITTER or via EMAIL
Photography Assignment Generator Apps now available on the app store!
Noel’s Portfolio
Work Done by My Students!
More Photo Tips
- I’ve been pretty lax with assignments, I apologize…Today I had an assignment to shoot a glass of Guinness…and had some fun with it. So i thought, why not make it an assignment!!! So, the assignment is to photograph your favourite beverage in a creative way! A couple of suggestions: LIGHTThis …
Photo Bits May 4th 2016
In honor of May The 4th Be With You day…the Force is strong with this edition of Photo Bits… Photographer Paweł Kadysz brings a little levity to the darkside with a series of images depicting Darth Vader as an everyday joe. #MayThe4thBeWithYou -Lots of people use Star Wars figures as …
Ideas Box Outtakes
Sharp eyed viewers may have noticed something amiss in my HOW I GET MY IDEAS post… That box in the photo WASN’T a dishwasher box! What I said WAS true. My dishwasher did die, and as a result I had to buy a new one. Seeing the dishwasher box did …
PHOTOGRAPHY WORDLE 1
Here is today’s photography wordle. It could be a digital or film photography-based term…a historic process…even an equipment or photography company brand name! If you want to get updated when I post a new one, you will need to register for a free acount HERE. Then you can go to …I’ve just launched V2.0 of my apps, and I’m looking for your help one last time to spread the word. AND HERE IS WHY:
Hi Everyone First off, a warning. This message will relates to the launch of v2.0 of my photography apps, and one more request for help from you to spread the word. If you are sick of hearing about my apps, you probably should stop reading. But before you do, I …
(1219)