Story Behind the Photo-Freeman Patterson

0921NCFREEMANBLURFAV1.jpg

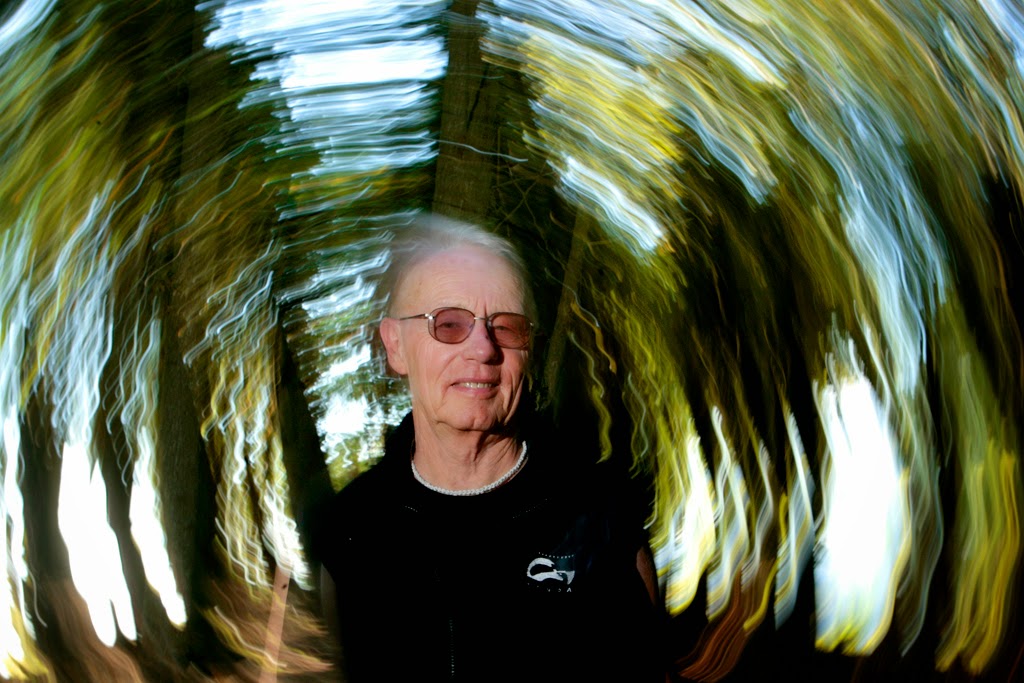
Many people ask me about how photographs I’ve done were taken. Lots of interest in the techniques or technical aspects. The Story Behind The Photo series answers those questions! This one is a portrait of world renowned photographer Freeman Patterson.
If you see any shots of mine that you are dying to know how they were done, send me an email and I’ll post em.

Read more

(1039)

How to photograph your Christmas tree…with or without your family!

christmas04

I just wanted to take a minute to wish you all a happy and safe holidays! I hope Santa Claus brings you some great photo goodies, and that 2015 brings you lots of great photo opportunities! I have a lot of to be thankful for, with the amount of support you have all given me with launch of my apps.
Here are some tips to get a nice photograph of your Christmas tree, as well as a nice family portrait with it over the holidays.

Read more

(665)

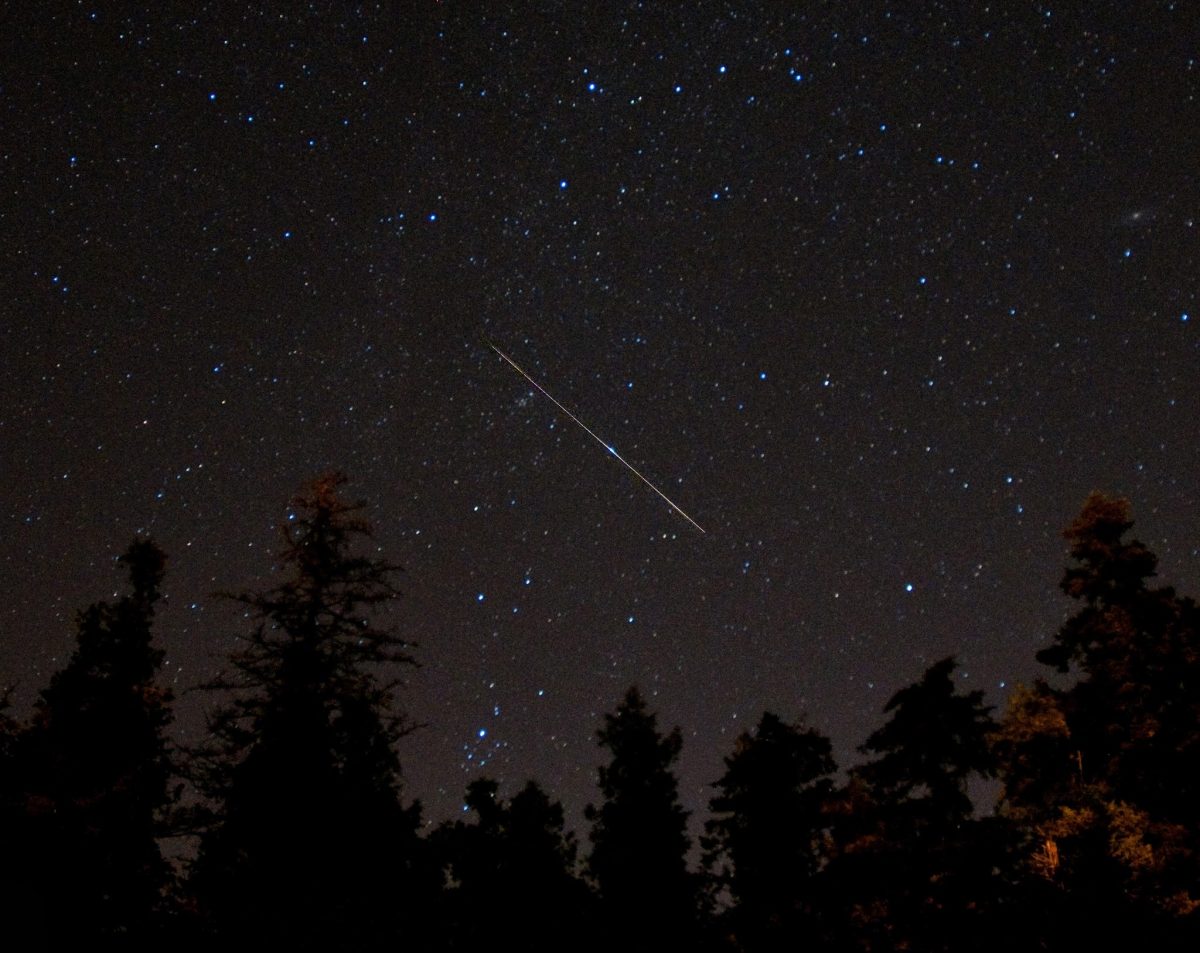
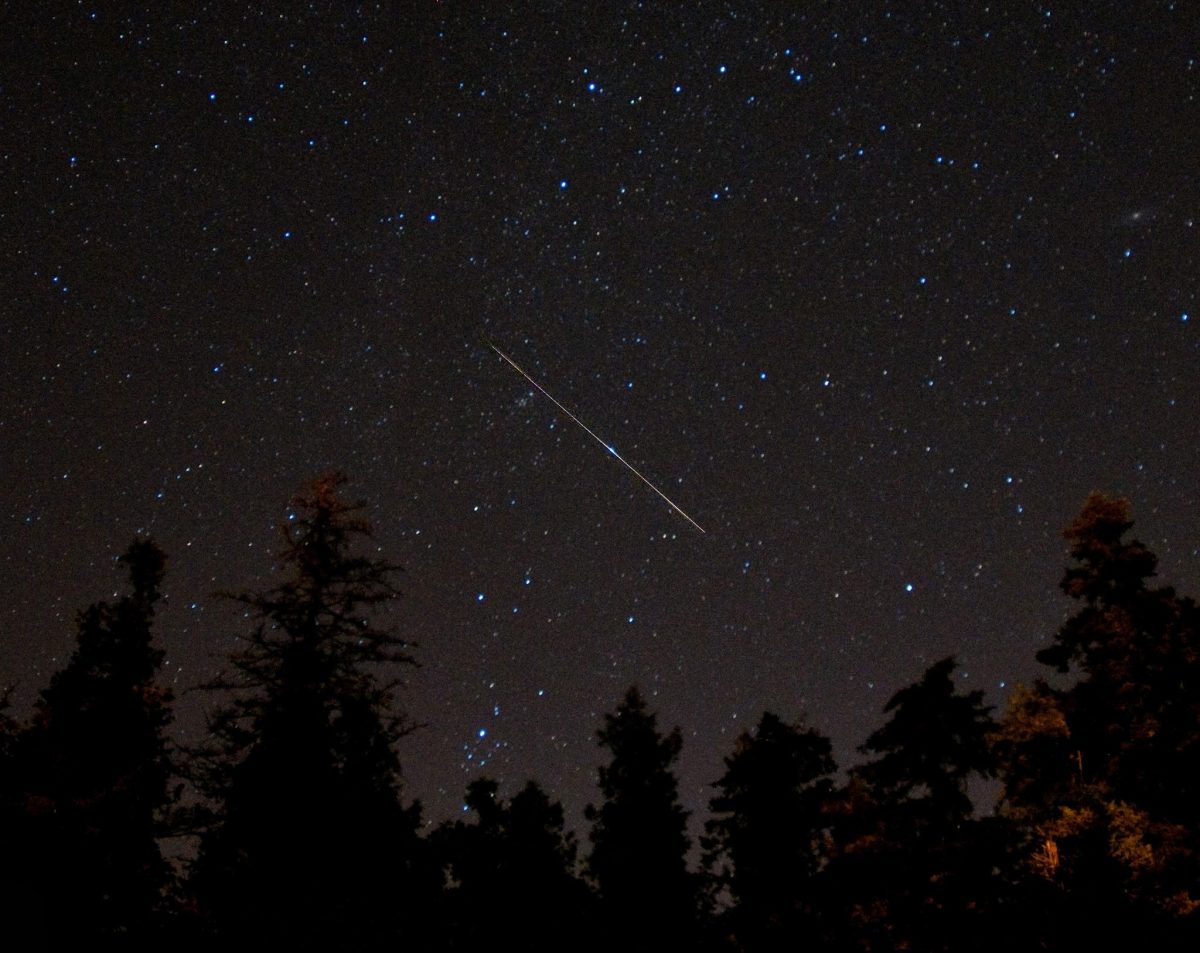
How To Photograph the Camelopardalids Meteor Shower

meteor(1)

So there is a new metor shower happening this Friday evening (May 23rd!), the Camelopardalids! (Read about them here, here, and here.) They are predicting possibly 100-400 meteors per hour, which means some great possible photographs. But since it’s a new shower…it could nothing!
Not like you have anything better to do on Friday night anyway, so get out your tripods, grab a coffee, and go shoot them! Here’s some tips on how!

Read more

(225)

How to photograph your Christmas tree…with or without your family!


I just wanted to take a minute to wish you all a happy and safe holidays! I hope Santa Claus brings you some great photo goodies, and that 2013 brings you lots of great photo opportunities! I have a lot of to be thankful for, with the amount of support you have all given me with launch of my apps.  I hope I have been able to say thanks to you all in some way so you know that I appreciate all your help.
I’d also like to offer you some tips to get a nice photo of your tree as well as a nice family portrait with it over the holidays.

If you’d like a nice shot of your tree like the one above here’s how!
This was done at night, with only the tree lights on, using the following steps:
Get out your tripod
A good setting would be 1/8th of a second at F8 using MANUAL mode(of course!) with ISO 400.  You can play with the exposure a bit to get brighter(slower shutter speed) or darker lights(higher shutter speed)
White balance wise, you can play around a bit to get different results.  The one above was with DAYLIGHT, but you could try TUNGSTEN if you find them too warm.
Use your self timer or remote to prevent possible camera shake.
If you want more details of the tree, you could use your flash to fill in the presents, etc.  I would suggest bouncing the light off the ceiling however to make it a nicer light!


You can also do a nice family portrait using the same settings to get a nice glow of the tree with the people.  You just have to make sure the people stay nice and still.  If you are worried about subject movement, try 1/60th of a second at F8.

Follow steps 1-2 above
3. Use FLASH whitebalance
4. You’ll get the best flash results if you bounce it off the ceiling.  Use TTL mode on the flash and adjust the flash +/- if necessary, or use MANUAL mode on the flash an adjust the power until the exposure is correct.  If you don’t have an external flash, just use your pop up.  If you can, put a diffuser in front of it, or a piece of paper, to soften the light.  If you use paper, don’t hold it too close to the flash, otherwise it might catch on fire!

Now, if you want yourself in the photograph, you’ll have to use your self time or remote control!


Of course, make sure it’s set to 10 seconds, not 2 like the one above… 🙂


Thanks again everyone! 2013 is going to be another great and exciting year of photography, learning, and other exciting things that I am looking at doing!

Have a safe and happy holidays!

Noel Chenier

ps-Dont forget to check out my photography assignment apps on the apple app store!  https://itunes.apple.com/ca/artist/noel-chenier/id566645905full details here: http://www.learnphoto.ca/apps

Noel Chenier
———-
Photographer and teacher
Connect with Noel on INSTAGRAM or TWITTER or via EMAIL 
Photography Assignment Generator Apps now available on the app store!
Noel’s Portfolio
Work Done by My Students!


More Photo Tips

  • How To Photograph The Geminid Meteor Shower

    How To Photograph The Geminid Meteor Shower

    The annual Geminid Meteor Shower is peaking on overnight on December 13 and 14th (Monday evening until dawn Tuesday!)  It’s the busiest one, but unfortunately the moon will be out so the best time will be between 3am and dawn 🙁 So get out your tripods, get a cup of …
  • I’ve just launched V2.0 of my apps, and I’m looking for your help one last time to spread the word. AND HERE IS WHY:

    Hi Everyone First off, a warning. This message will relates to the launch of v2.0 of my photography apps, and one more request for help from you to spread the word. If you are sick of hearing about my apps, you probably should stop reading.  But before you do, I …
  • Pandemic Photo Challenge: Black and White Reprocessing

    Pandemic Photo Challenge: Black and White Reprocessing

      So for many of us it’s two weeks into being stuck at home by ourselves (or with the kids) due to the Covid-19 Corona Virus pandemic…are you getting kinda squirrelly? Figured I’d help out and start giving out some suggestions and ideas for keeping yourself busy with your photography …
  • Photographers: Stop Being The Person Who Is Never There In Your Family Photos

    Photographers: Stop Being The Person Who Is Never There In Your Family Photos

    I was photographing my kids on vacation a few weeks ago as we enjoyed fun in the sun and sand at Cavendish, Prince Edward Island…and I began thinking about our family photos. Like most people, I have albums full of great images of our vacations, school concerts, Christmas day, first …
  • Photo Bits March 22nd 2016

    Google has made the Nik Collection of plugins for Photoshop/Lightroom free to download. A lot of useful tools in this bundle, from black and white conversion, hdr, sharpening, image effects and more. Note: You will need Photoshop CS/CC, Elements, or Lightroom to use it. [ms-protect-content id="2044"]Sorry! As a free member, …

(319)

Photography Assignment Generator Apps NOW AVAILABLE ON THE APP STORE!

I am so excited to finally announce the launch of the Learnphoto.ca Photography Assignment Generator app for SLR Photographers and the iPhotography Assignment Generator App for iPhone/iPod touch shooters.  NOW AVAILABLE ON THE APP STORE FOR IPHONE AND IPOD TOUCH HERE.  If you have any problems or questions, email me.

Whether you are taking on a 365 day photo challenge or just looking for inspiration, these apps will be just perfect for you. While most apps on the app store let you DO things to the photographs you taken, like add text, borders, filters, or special effects, these app is about ideas for TAKING photographs.

Photography Assignment Generator For SLR Features:

OVER 100 INDIVIDUAL ASSIGNMENTS AND THOUSANDS OF POTENTIAL RANDOM ONES! Everything from camera settings, rules of composition, creative shooting techniques, photographing people, landscape and nature, and more subjects! Random objects and places, combined with techniques, environments, offer you hundreds of thousands of possibilities! The scavenger hunt assignment gives you lists of terms to find with your camera…with MILLIONS of possible combinations! You can choose from the list, or have the app give you one at random!

OVER 700 EXAMPLE IMAGES
Each assignment has a series of example images to demonstrate the technique or inspire you!


iPhotography Assignment Generator for iPhone/iPod Touches:

OVER 75 INDIVIDUAL ASSIGNMENTS AND THOUSANDS OF POTENTIAL RANDOM ONES!
Tailored to shooting with your iPhone/iPod, assignments range from the rules of composition, creative shooting techniques, photographing people, landscape and nature, and more subjects! Random objects and places, combined with techniques, environments, offer you hundreds of thousands of possibilities! The scavenger hunt assignment gives you lists of terms to find with your camera…with MILLIONS of possible combinations! You can choose from the list, or have the app give you one at random! Each assignment has a series of example images to demonstrate the technique or inspire you, with over 500 images in the app in total.

CAMERA TIPS/CAMERA+/INSTAGRAM TUTORIALS
The app includes tutorials on getting better photos with your iPhone/iPod touch, as well as popular apps 


FEATURES OF BOTH

DAILY REMINDER
Taking part in a 365 day challenge?  Get the app to send you a reminder each day to get your photo assignment to keep you on track.

NO NETWORK REQUIRED!
The app is completely self-contained and does not require a wifi or network connection.  No matter where you are, you can always get an assignment. NOTE: Due to the huge amount of content, the app must be downloaded over wi-fi or through iTunes on your computer.

VIDEO TOURS
Take a quick tour of the apps and their features by watching my online tour videos here: https://vimeo.com/channels/learnphoto

FREE VERSION
As a firm believe that people should be able to try before they buy, there is also a FREE version of the full app that contains just a fraction of the assignments available in the full paid version…but should be enough to make you want it all! It is from the full slr version, but is basically the same as the iPhone/iPod version, so it would work for both. 


IPAD USERS
Please note, the app with run on iPad, but not full screen(online at iPhone size). I am looking at creating a iPad version if there is interest.  Email me at app@learnphoto.ca to tell me you want it!

 
HOW YOU CAN HELP MAKE THIS A SUCCESS!

The only way this is going to be successful is to get on the popular/most downloaded list so users across the world see it…and for that I need your help!

I hope of course you download the full app!
But whether you download the full app or not, please download the free version as well. More downloads equals more popular! You can delete it after you’ve downloaded it, no worries.

Here are some other ways you can help out:

-Please forward this info on the app to anyone else you think may be interested! Make sure to cc me on the email!
-Post the info on any photographers forums, blogs, etc, that you take part in who may be interested.
-Like and share my app page on Facebook https://www.facebook.com/PhotographyAppsByLearnphotoca
-Like and share my posts on Facebook about the app launch.
-Like and share my app page on my website at http://www.learnphoto.ca/apps
-Tweet about the app, or retweet my posts at https://twitter.com/learnphotoca
-Share the videos on my channels https://vimeo.com/channels/learnphoto
-Rate and review it on the app store!

SAYING THANKS FOR THE HELP

Obviously I have to try to thank you for helping me out, so I’m going to offer some launch prizes.
Every time you do any of the above, you’re name will go in a draw.  So if you share and like a status, like my app page, and email the info(cc me!), that would be 4 entries.
Starting off, I’m going to be giving away 5-5$50 gift certificates towards courses(transferable if you don’t want to use them, would make a great Christmas gift!)…and will add more as sales increase. if the apps really take off, I’ll start adding some bigger prizes, like iPod touches!

Thank you for checking out the app, I’m really hoping this can give me the opportunity to just do what I love, teach photography!

Please contact me if you have any questions or problems!
Noel

———————-
Photographer and teacher
LEARNPHOTO.CA, Noel’s online photography learning community!
http://www.learnphoto.ca
NEW!
Photography Assignment Generator Apps now available on the app store!
https://itunes.apple.com/ca/artist/noel-chenier/id566645905
More info here: http://www.learnphoto.ca/apps

P
ortfolio http://www.noelchenier.ca
Noel’s Photo Tips Blog http://noelchenier.blogspot.com
Work Done by My Students! http://www.learnphoto.ca/gallery
Contact Email: nchenier@nbnet.nb.ca
Contact Phone: 608-6424

(310)

Fundy Discovery Aquarium

Hello all!
Spent some time at the newly opened Fundy Discovery Aquarium in St. Andrews, thought I’d pass on some info on getting great shots of the new exhibits! For the month of September, the admission is half price as all exhibits aren’t complete yet.

WHEN TO GO
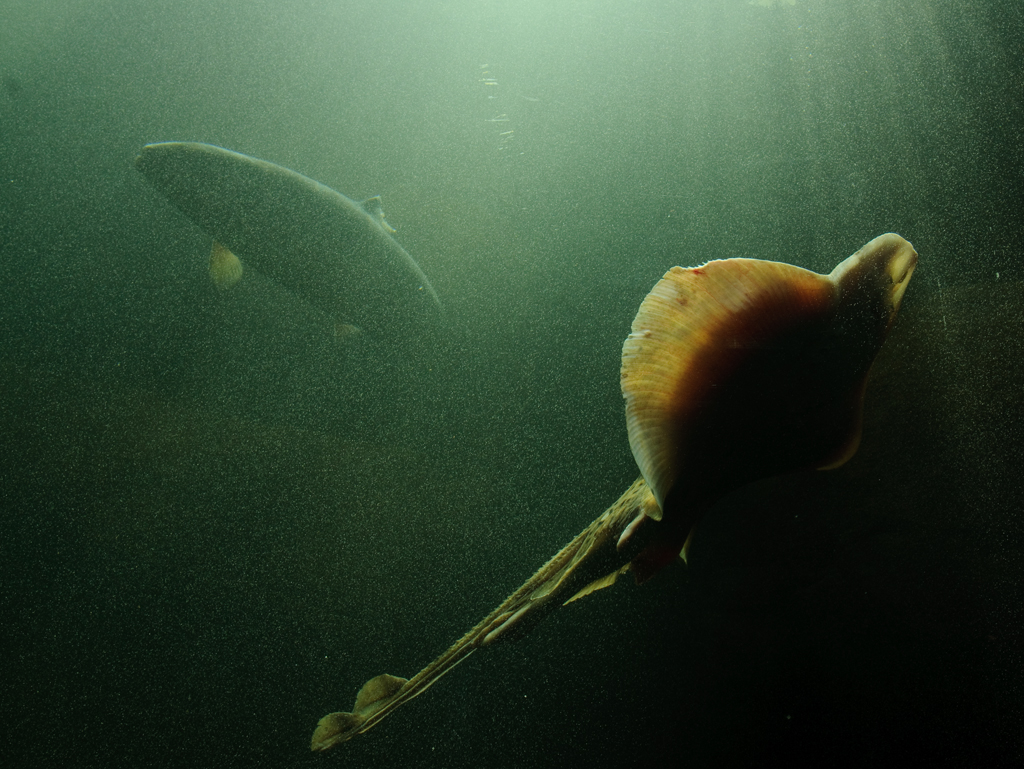
First off, to get the most shooting opportunities, you must go when it’s sunny outside. The tanks are on the sides of the building, and the water cuts a lot of light out. If it’s overcast, there won’t be enough light to get shots.
I would suggest going sometime between 11am-1pm. That way the sun will be high in the sky shining right down.

SHOOTING THE TOUCH POOLS
The aquarium has two touch pools, one that is full of Little Skates, and one that is full of all sorts of aquatic life!

The problem is that the light is not bright enough to shoot handheld. So you have two options-tripod, or using flash.

If you are going to use the tripod, the Skates are out. They are moving around too much to get a sharp picture. The touch pool however would be fine. I would suggest using a polarizer to remove glare from the surface of the water. You’ll have to shoot completely still objects however.

The BETTER method is to use flash. However, there is one problem with flash…


Yep, pretty harsh.Not to mention if you shoot from directly above, the flash will reflect back at the camera. Not pretty.

To fix this, you want to use the flash off-camera, either through a off camera flash cord, or trigger your flash wireless.
Just compare the difference: Images on the left are done with direct flash, the right are done using the off-camera flash cord.


Off camera flash cords are about $100 or so. Buy one.
If you have a pop-up flash, you’ll have to try to avoid shooting directly from above to avoid the reflection…but you’ll still get the glare.

I used MANUAL mode on my flash, but you could also use TTL. You may need to use the flash exposure compensation and turn it up a bit as the water will cut the light.

CAMERA SETTINGS WHEN USING FLASH
ISO-400. You will be using the flash to light the tank

SHUTTER SPEED-You can use your highest sync speed (usually 1/200th of a second or slower) to ensure anything that is moving won’t give you a bit of blur.

APERTURE-Since you are close to the objects, and your flash is close, you can use F11/F16 to get lots of depth of field.

SHOOTING THE SKATE POOL
Skates are really awesome…they will actually come up to the surface to greet you and allow you to touch them on top, and below!
Shoot with the same flash techniques as above.


SETTINGS FOR SHOOTING THE LARGE FISH TANKS
You should use MANUAL(M) shooting mode, because every other mode is just going to blow the exposure because of the darkness of the water.

ISO-As long as the sun is shinning into the tank, 400 is fine. Otherwise, you may have to jack it up to 800/1600.

SHUTTER SPEED-The occupants of the tank don’t swim too fast, so 1/250th of a second will be fine to freeze them.

APERTURE-Pretty well you’ll just have to try an aperture and shoot until the exposure looks good. Because of all the dark water, the meter’s going to give you the wrong exposure.
F8 worked great for me. But the exposure will change based on the light. Both photos below were taken at the same exposure, 1/250th at F8.


I personally preferred the darker light!

You can also play with the exposure a bit for different effects with the light. If you want more detail on the fish, open up the aperture more. The following spiny dogfish and the salmon were shot at F5, which gave me a bit more detail on the fish as well as some nice light coming through his fins.


You can also use the interior window as a nice framing element.


You can also try some nice close ups too!


WHITE BALANCE
The water filters the sunlight, giving it a very green cast. I used DAYLIGHT(SUN) balance, because I didn’t mind the cast. To me, it says “underwater”
Since I was shooting RAW however, I knew I would be able to adjust this later if I didn’t like the results.
To to see what the images would look like, in Camera Raw I tried a few different balances. Basically none of the presets gave me anything nicer…so I tried AUTO, and voila! The image on the left is with DAYLIGHT, the one on the right is AUTO (5750 temperature, +30 magenta). While it shows the color the skate would be out of water, it doesn’t show how it looked to my eye.


WHAT ABOUT FLASH?

Flash is not going to work very well, as it will reflect back at the camera. My only suggestion is to try to put the camera lens right on the glass, that way it’s less likely to reflect. I tried some shots with the flash off-camera, but the light just reflected everywhere.
Flash can be used however to get a good photo of your family in front of one of the tanks…use the same shutter speed/aperture as above, then pop up the flash. To avoid the glare off the back, I put my tall daughter in the middle!

just watch out for…

cue Jaws music….


THE OTHER TANKS
Most of the other tanks are very poorly lit…with the non-moving life like the lobsters, you could try shooting on tripod. I tried some shots with off-camera flash, but the light just bounced everywhere. You can try putting the lens right up to the glass, but the results I was getting was disappointing.

WHAT ABOUT THE SEALS?
Well…i personally don’t really like the new set up for the seals from a photography standpoint.. It’s great to be able to see them under the water, no question…but it’s really hard to photograph. I’m not sure if the sun shines down into that side tank…if it does, you will get the same light as above. It might happen more in the morning. The above viewing area doesn’t give you the same view as the previous one…it might be that the seals can swim underwater more now so they do…I don’t really know.

So if you get a chance, head down to St. Andrews and check out the new Fundy Discovery Aquarium!

(211)