Photo Bits May 10th 2016

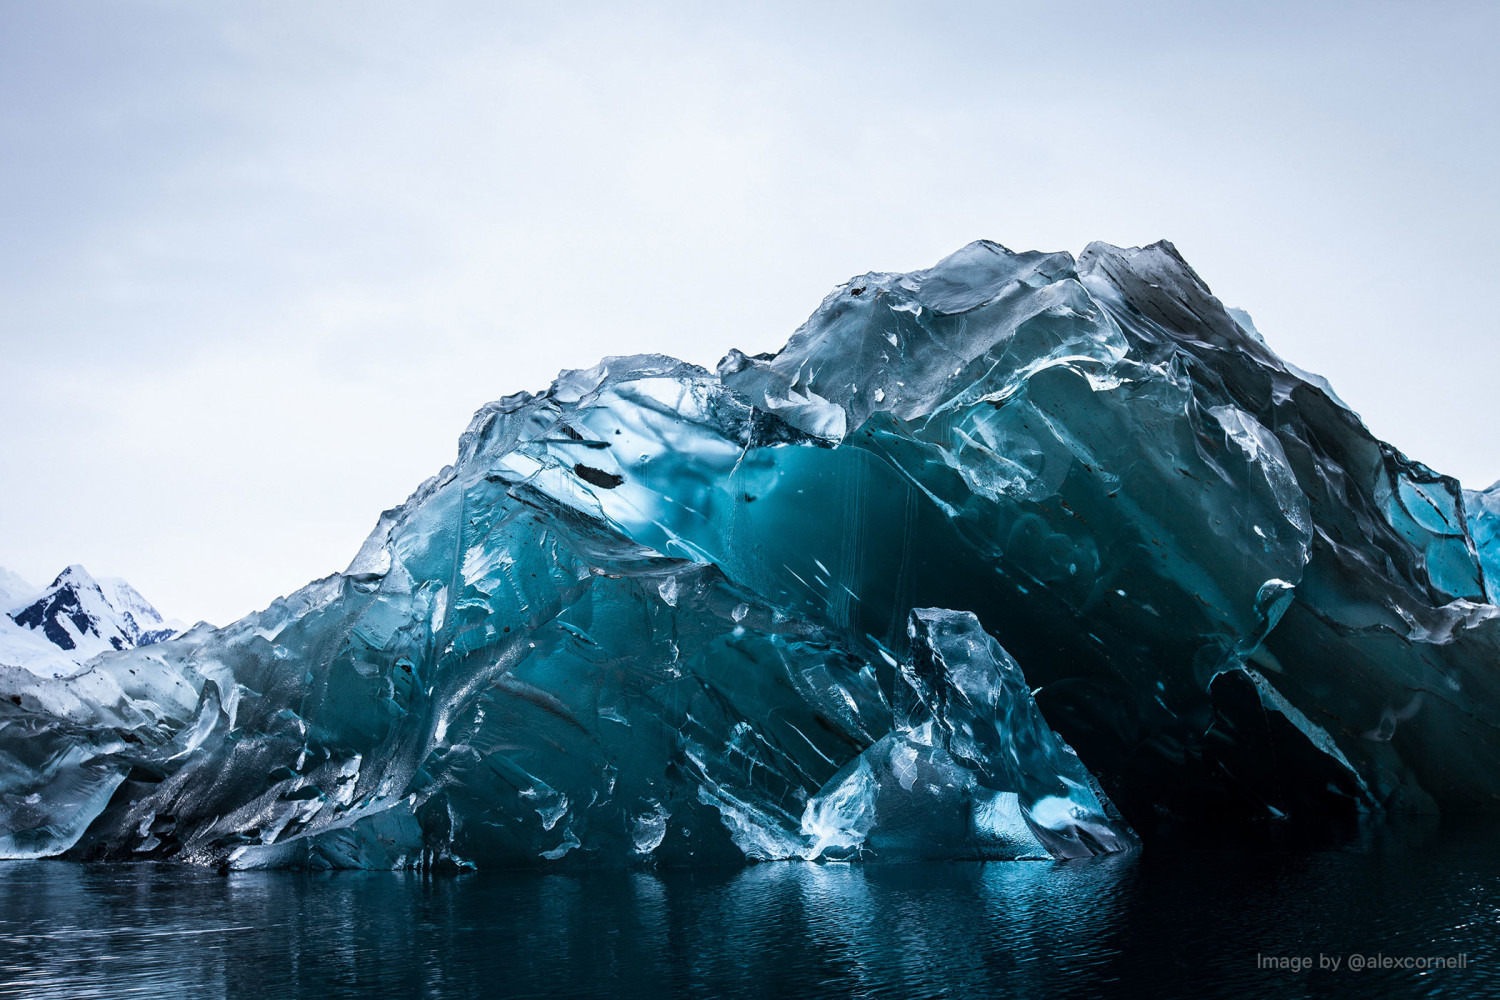
Icebergs always make for great images…but look at how amazing they look when they have flipped upside down!

[ms-protect-content id="2044"]
Sorry! As s a free member, you only get one link. One of the perks of the PREMIUM membership! Sign up here [ms-membership-buy id="1885"]

Here you can see what a full Photo Bits looks like for Premium members.
[/ms-protect-content]

[ms-protect-content id="1916"]

[ms-membership-login title="Registered user? Log in here:" register="no" form="login" holderclass="ms-login-form-short" redirect_login='']


Sorry! As a guest, you only get one link. One of the perks of the PREMIUM membership! Sign up here [ms-membership-buy id="1885"]

Here you can see what a full Photo Bits looks like for Premium members.

[/ms-protect-content]

[ms-protect-content id="1885,1891,1892"]

-Salivating over all those delicious photos you see of food? Not so appetizing after you read some of the tricks used in food photography

-Vincenzo Mazzo shares the story of how he destroyed his car door but then shot an award-winning photo

-TED talks are always informative and cover a wide range of topics and issues…check out all the ones related to photography

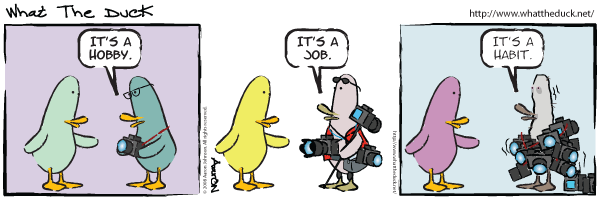
WHAT THE DUCK
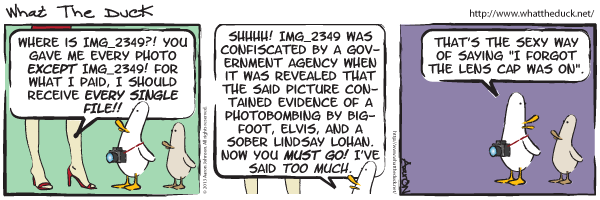
Check out more great strips here!

-APP YOU SHOULD DOWNLOAD

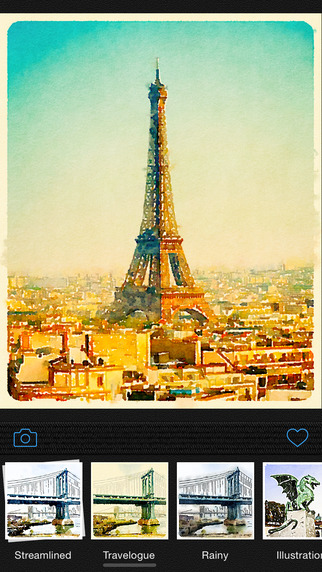
Mextures is a great app editing your images, with a wide assortment of textures, light leaks, and effects.

On the app store

More info on the app

Examples images made using Mextures

-LATEST DIRECTORY LINK:

Life Magazine

Life Magazine is long gone, but Time is nice enough to keep an online archive of the amazing photography from it.

You can submit interesting photography sites to the links directory here.

Have you come across an awesome photography related article that you think other people would be interested in? Email it to me and I’ll post it in a future Photo Bits!

[/ms-protect-content]

Want to make sure you get all the latest posts and info? Subscribe!

More Photo Bits

(290)

Photo Bits May 4th 2016

In honor of May The 4th Be With You day…the Force is strong with this edition of Photo Bits…
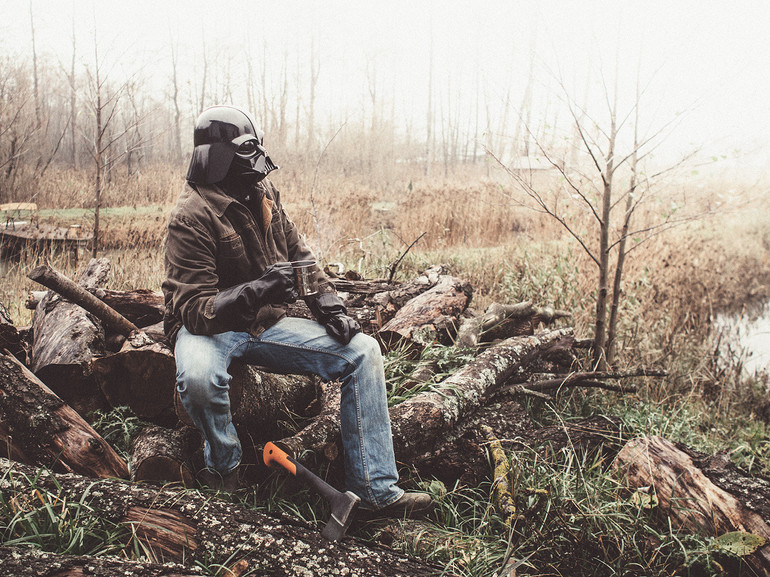
Photographer Paweł Kadysz brings a little levity to the darkside with a series of images depicting Darth Vader as an everyday joe.

#MayThe4thBeWithYou

-Lots of people use Star Wars figures as their subject…check out
Zahir Batin, Stormtroopers365, Rather Childish, and Vesa Lehtimaki

-Here’s an easy (although very boring voiced) tutorial on making lightsabers

50 behind the scenes images of the cast of Star Wars

-Series of portraits of Star Wars fans and their collections

-Site containing images from the original shoots of the Star Wars figures

WHAT THE DUCK

Check out more great strips here!

-INSTAGRAMMER YOUR SHOULD FOLLOW


Why The Long Play Face is a hilarious mash up of album covers redone using Star Wars characters.

Want to make sure you get all the latest posts and info? Subscribe!

More Photo Bits

(295)

Photo Bits March 29th 2016


Interview with Jerry Uelsmann, a pioneer in image manipulation. BTW…all done in the DARKROOM…no photoshop!

[ms-protect-content id="2044"]Sorry!
As a free member, you only get one link. One of the perks of the PREMIUM membership! Sign up here [ms-membership-buy id="1885"]
[/ms-protect-content]

[ms-protect-content id="1916"]Sorry!
As a guest, you only get one link. One of the perks of the PREMIUM membership! Sign up here [ms-membership-buy id="1885"]

[/ms-protect-content]

[ms-protect-content id="1885,1891,1892"]

-Interesting series of videos by Mathieu Stern of him shooting with weird and old lenses

-PhotoJojo is celebrating 10 years with a list of their 10 most popular posts.

-Learn about the creation of the first Kodak digital camera in this New York Times Lens Blog article.

-Hilarious series of images by Freddy Fabris that recreate famous paintings…with mechanics as the subjects.

WHAT THE DUCK

Check out more great strips here!

-APP YOU SHOULD DOWNLOAD

Color Thief is an interesting app that allows you to take colors from one image and transfer them to another. Takes some playing around with, but it can provide some very interesting results.

On the app store

-LATEST DIRECTORY LINK:

Canadian Photography Institute

The National Gallery of Canada is establishing the Canadian Photography Institute (CPI), a world-class, multidisciplinary research centre dedicated to the history, evolution and future of photography.

You can submit interesting photography sites to the links directory here.

Have you come across an awesome photography related article that you think other people would be interested in? Email it to me and I’ll post it in a future Photo Bits!

[/ms-protect-content]

Want to make sure you get all the latest posts and info? Subscribe!

More Photo Bits

(156)

Photo Bits March 22nd 2016

nik

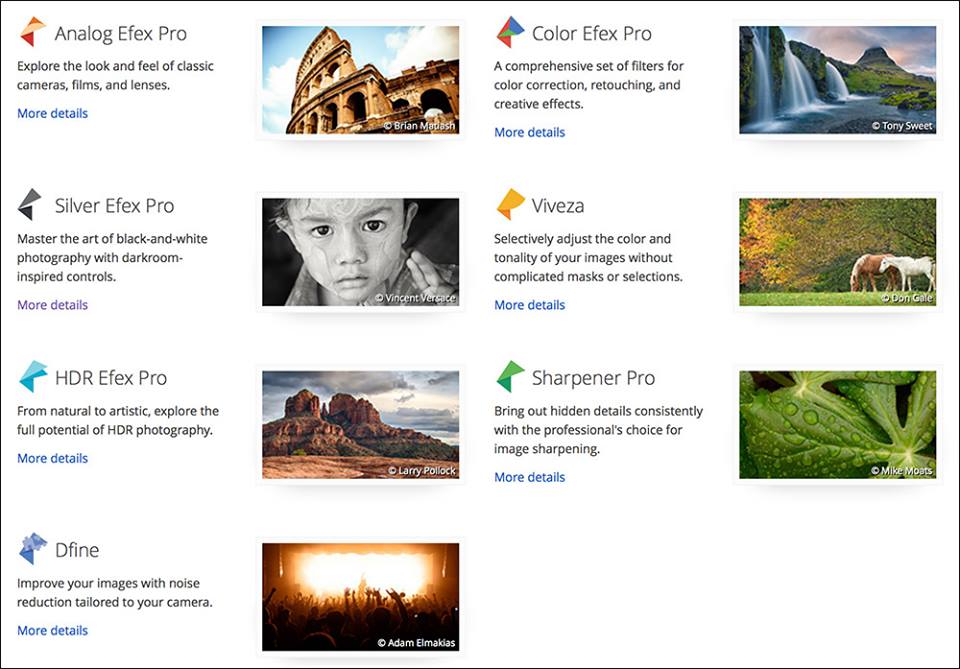
Google has made the Nik Collection of plugins for Photoshop/Lightroom free to download. A lot of useful tools in this bundle, from black and white conversion, hdr, sharpening, image effects and more. Note: You will need Photoshop CS/CC, Elements, or Lightroom to use it.

[ms-protect-content id="2044"]Sorry!
As a free member, you only get one link. One of the perks of the PREMIUM membership! Sign up here [ms-membership-buy id="1885"]
[/ms-protect-content]

[ms-protect-content id="1916"]Sorry!
As a guest, you only get one link. One of the perks of the PREMIUM membership! Sign up here [ms-membership-buy id="1885"]

[/ms-protect-content]

[ms-protect-content id="1885,1891,1892"]

-Learn about the creation of the first Kodak digital camera in this New York Times Lens Blog article.

-Hilarious series of images by Freddy Fabris that recreate famous paintings…with mechanics as the subjects.

-Here is a hilarious video of photographers trying out Photoshop Version 1.0

-Strange story on how photographer Ryan Visima got kicked off a beach for taking photos

WHAT THE DUCK

Check out more great strips here!

-APP YOU SHOULD DOWNLOAD

LetterGlow is a great app for add text, artwork, and effects to your images. It has tons of fonts, lots of styles.

On the app store

More info on the app


-LATEST DIRECTORY LINK:

Life Magazine

Life Magazine is long gone, but Time is nice enough to keep an online archive of the amazing photography from it.

You can submit interesting photography sites to the links directory here.

Have you come across an awesome photography related article that you think other people would be interested in? Email it to me and I’ll post it in a future Photo Bits!

[/ms-protect-content]

Want to make sure you get all the latest posts and info? Subscribe!

More Photo Bits

(128)

Photo Bits Mar 15th 2016

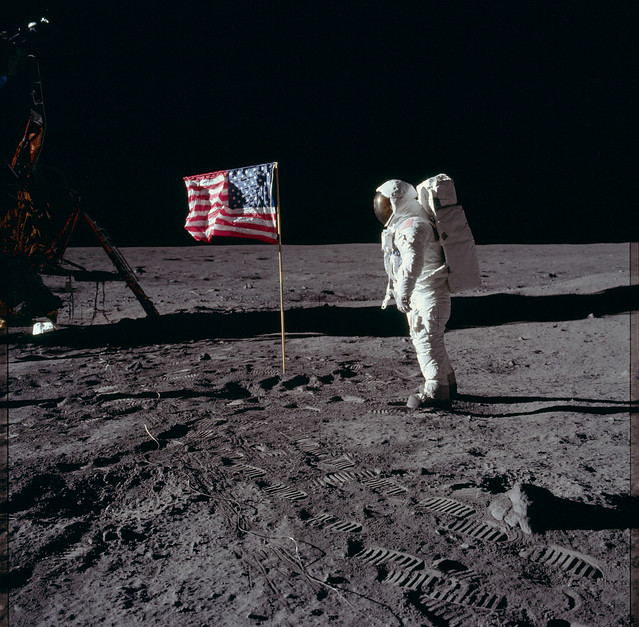
Over 14,000 images from the Apollo missions have been put on Flickr. One small step for man, one giant leap for photography!

[ms-protect-content id=”2044″]

As a free member, you only get one link. The remaining links would be hidden from you. One of the perks of the PREMIUM membership! Sign up here [ms-membership-buy id="1885"]
[/ms-protect-content]

[ms-protect-content id="1916"] As a guest, you only get one link. The remaining links would be hidden from you. One of the perks of the PREMIUM membership! Sign up here [ms-membership-buy id="1885"]

[/ms-protect-content]

-If you can believe it, some parents are naming their kids after Instagram filters

-The Camera Store has a You Tube channel, with lots of great videos…including the Battle of F-Stop Ridge and it’s sequel

-Looking for a great gift for the photographer in your life? Check out this list of Time’s top photography books of 2015

Browse over 170,000 images taken by photographers from 1935 to 1945 created by the United States Farm Security Administration and Office of War Information

-Wonderful behind the scenes-ish page about the Sports Illustrated boxing photographs of Neil Leifer

WHAT THE DUCK

Check out more great strips here!

-INSTAGRAMMER YOUR SHOULD FOLLOW

Mark Hemmings is a Saint John based travel photographer and educator who takes amazing photos on his journeys around the world.

-APP YOU SHOULD DOWNLOAD

Waterlogue is a great app for add text, artwork, and effects to your images. It has tons of fonts, lots of styles.

On the app store

More info on the app

Examples images made using Waterlogue

-LATEST LINKS:

Lens Culture

A great online showcase of contemporary photography in a diverse range of genres

https://www.lensculture.com/

You can submit interesting photography sites to the links directory here.

Have you come across an awesome photography related article that you think other people would be interested in? Email it to me and I’ll post it in a future Photo Bits!

Want to make sure you get all the latest posts and info? Subscribe!

More Photo Bits

(297)

Ask Noel:Do I Need To Buy A Light Meter?

Mike P asks:

“Are hand-held light meters still useful? Should I invest in one?”

When photography first began, camera’s didn’t have built in meters. You had to buy a hand held device, called a light meter, which would give you the correct settings. As technology improved, companies began to install meters in-camera.

The emergence of the use of flash over traditional hot lights in studio based photography resulted in creation of light meters to measure the flash output, as the in-camera meter could not. This would allow photographers to ensure their exposures were correct, as there was no way to see the results until the film was processed.

Once digital cameras became popular, the ability to to see the image immediately after shooting in many ways made the light meter obsolete. You could see right away if the light output was correct. If it wasn’t you could adjust the power, shoot again. Still not correct? Adjust a bit more, shoot again. Repeat until you got the correct result.

That being said…I’ve continued to use my hand held meter for working with my studio lights.
Why?
1)It saves me time. The shoot and adjust method frankly takes so much longer than setting up the lights, meter the light, and adjust.

2)I can ensure the correct light ratio for certain situations. For example, a white background should be no more than 2 stop brighter than the subject light. If it’s too bright, you will start to get halo/fringing/flare around the edges. With my light meter, and can get the exact aperture for the subject light, then meter the background to ensure it is no more than two stops. For example, if the subject light meters at F8, the background should be no brighter than F16.

If you want to purchase one, the Sekonic L-308 is a good option for both ambient and studio. If you just need an ambient light meter, there is the Sekonic L-398. Those would be my recommendations, but there are cheaper models out there.

You can also buy a light meter attachment for your iPhone/iPod, the Lumu, but it only does ambient. There are also a variety of light meter apps available of iOS, including the Pocket Light Meter (which I have used and found to be pretty accurate, but again, only for ambient)

So should you buy a light meter? Really depends on what kind of shooting you do. If you do a lot of studio work with film, it’s a must have. With digital? I think it’s a useful tool especially when you are doing complex light setups. For everyday shooting with a digital SLR? Not really, your in-camera meter does the job perfectly. Shooting with an old film camera? Ambient only meter would be useful for sure.

DO YOU HAVE A QUESTION FOR NOEL? ASK AWAY:

Please complete the required fields.
Please select your image(s) to upload.

MORE ASK NOEL QUESTIONS!

Ask Noel

(325)

Ask Noel-Questions about RAW and Photoshop versions

Mary L asks:

“I saw a post you made last week about Photoshop Elements 14 being on sale at Staples… I just got a Canon 7D Mark ii and now I can’t open RAW in my Photoshop Elements12. Is there something I can do or do I need to get the 14?”

You need to upgrade, because Adobe stops updating raw plugins on older versions of their software. When new cameras come up, they are only added to the latest version plugin update. So Adobe Photoshop Elements 12 will never be able to read your RAW files with any camera bought after version 13 came out.

Another option is to convert all your RAW files to DNG…which any version of Photoshop can, and will in the future, read…Here you can download latest DNG converter for Windows or Mac.

But then you have to take the time to convert them and will end up having two copies of each image, which of course will take up twice as much space.

The same thing goes if you use any version of Photoshop CS up to the last commercial version available for purchase pre-Creative Cloud. If you have Creative Cloud, you will continue to get updates..that’s what you are paying the monthly fee for of course.

Speaking of Photoshop Creative Cloud….

Many ask:

“Do I need to buy the full version of Photoshop, or is Elements all I need?”

The answer to that really depends on the photography you are doing.
For most photographers, Elements has all the tools you will ever need. Image correction, resizing, cropping, adding things, taking away things, add filters and effects, working with RAW, etc.

If you are planning to get into professional photography shooting portraits, weddings, etc, then the full version has more tools and functionality that you will find useful.

DO YOU HAVE A QUESTION FOR NOEL? ASK AWAY:

Please complete the required fields.
Please select your image(s) to upload.

MORE ASK NOEL QUESTIONS!

Ask Noel

(373)

Ask Noel: Why Do Some Version Of A Lens Cost So Much More?

Bill K asks:

“I was looking at buying a zoom lens, and I saw one that was 70-300mm for $300, another one was $600…and then there was a 70-200mm that was over $2000. Why is this?”

It can definitely be confusing sometimes when looking at different options for lenses.

Here are some of the reasons for the differences in price

1)WIDER AND CONSTANT APERTURES
This is the #1 factor in the cost difference. With most zoom lenses, they will lose a bit of light when you zoom in. That is why you will see lenses labelled with F3.5-5.6. This means at the widest length, the widest aperture is F3.5, but zoomed in, it’s F5.6. While it might not seem like much, that’s a big difference when shooting moving subjects indoors under crappy light…like a hockey game for example! So that $2000+ 70-200mm lens not only has a wider aperture of F2.8…it is at that aperture CONSTANTLY as you zoom. This is important, because you will zoom in and out a lot when shooting sports, and can’t be constantly adjusting the shutter speed to compensate. Also, if the lens gets darker, that could mean you won’t get a fast enough shutter speed to freeze the action.

WHY YOU NEED THIS: If you shoot a lot of indoor events, sports, and low-light photography.

2)IMAGE STABILIZER TECHNOLOGY
When you use larger lenses, any small movements you make are magnified. This means you are more likely to get blur from camera shake when hand holding the camera.
Image stabilizers (VR for Nikon, IS for Canon, OS for Sigma) compensate for those small movements and help get sharper images.  This easily adds hundreds of dollars to the cost of a lens.
NOTE: Image stabilizer technology can only help prevent camera shake blur. It does absolutely nothing for MOVING subjects. Anyone who tells you otherwise has no idea what they are talking about.

QUICK TIP: When using a tripod, turn the IS/VR OFF!!! It can actually ADD motion blur to your images!

WHY YOU NEED THIS: If you shoot handheld under low-light a lot, it will help prevent camera shake blur.

3)BETTER AUTOFOCUS/FOCUSING SYSTEM
Nikon’s SILENT WAVE MOTOR (SWM) or Canon’s Ultra Sonic Motor (USM) allow for much faster autofocus tracking, which should result in sharper images. These of course cost money!
With most cheaper lenses, the manual focus ring is the end of the lens. This can cause issues when using polarizing filters as the lens will rotate when it focuses, which will change the effect of the polarizer. The better system involves an internal focus, where the ring is near the middle of the lens instead and won’t interfere with filters.

WHY YOU NEED THIS: Helps get better images with sports, action, and kids.

4)BETTER QUALITY GLASS
Some models of lenses have better glass and/or coatings on them that will result in better optics and sharper images.

WHY YOU NEED THIS: If you print images big, you’ll want the best optics possible.

As you can see, there are lots of factors that affect the price of lenses. Hopefully this helps you make your decision! As always, feel free to email me if you have any more questions!

DO YOU HAVE A QUESTION FOR NOEL? ASK AWAY:

Please complete the required fields.
Please select your image(s) to upload.

MORE ASK NOEL QUESTIONS!

Ask Noel

(183)

Ask Noel: Why Won’t My Camera Take A Photo Sometimes?

Joel H asks:

“Every now and then my camera seems to refuse to take a picture. I can hear/see the autofocus moving, but it never seems to stop.”

Most likely this is because the autofocus can’t find a subject to lock onto, therefore it won’t take the photograph.

In order for the autofocus to lock, it needs to be able to find lines, patterns, etc. If the autofocus tries to lock on something that doesn’t have those, like a blue sky, or a plain wall, or a person’s plain white t-shirt….it will never shoot.

SOLUTIONS:

1)CHANGE THE AUTOFOCUS POINT
Most cameras come from the factory set up so that the CAMERA automatically chooses the AF point. But you can change this so you can manually choose where it tries to focus.
-On a Nikon, you will need to go into your menu and set your AF area mode to SINGLE, then you can use the back D-Pad to change the point. You will see the point selected inside the viewfinder will be red.
-On a Canon, you will find this button on the back of the camera, to the right of the auto exposure lock button (*).

So for example, if you have a scene with a lot of blue sky, you can move the focus point to the bottom so it focuses on the landscape instead. Or if the camera seems to be trying to focus on a person’s shirt, move the point to the top so it focuses on their face.

Once you are finished shooting,set the point back to AUTO, or my personal preference, in the middle.

2)LOCK THE AUTOFOCUS SOMEWHERE ELSE
-Tilt the camera up/down or left/right so there is more of a subject to focus on, or gives the camera lines/shapes/patterns to lock onto.
-Push the shutter button down halfway until the camera beeps or notifies you it has locked the focus
-Keeping the button held down, recompose the scene as you wish, then push it down fully to take the photo.

This technique works great when you have the focus point set to the middle.

DO YOU HAVE A QUESTION FOR NOEL? ASK AWAY:

Please complete the required fields.
Please select your image(s) to upload.

MORE ASK NOEL QUESTIONS!

Ask Noel

(180)

Ask Noel: Should I Shoot In RAW Or JPEG?

Josh W asks:

“I see it posted a lot online that we should be shooting RAW instead of JPEG. Why is that and what are the differences?”

I personally hate these blanket “You should be doing THIS or THAT” statements, because the answer to this question really depends on YOU!

WHAT ARE RAW AND JPEG FORMATS?

RAW files are as the name suggests…the RAW image data. It’s as the camera recorded it, with no adjustments, sharpening applied, etc. Every megapixel is there, so it provides the highest quality image.

JPEG is the STANDARD image format. It’s compressed to reduce file size, and you can set the level of quality on your camera. You can lower the compression levels to make the files smaller…but never do that. Always choose the highest quality JPEG.

PROS OF RAW

-RAW files give you the highest quality image possible as it’s not compressed
-When you over expose or under expose, there is more information in the RAW file, meaning you will more likely be able to fix it
-If you shoot with the wrong WHITE BALANCE, you can easily switch it in the raw plugins
-With software like Adobe Photoshop Creative Cloud or Photohop Elements, Lightroom, or Capture ONE, you can do a lot of corrections at once to be more efficient

CONS OF RAW

-RAW files are VERY LARGE. It will severely cut down the amount of pictures you can take on a memory card
-In order to really work with your RAW files, you will need to have a program like Adobe Photoshop Creative Cloud or Photohop Elements, Lightroom, or Capture ONE. And if you buy a newer camera, you will need to upgrade to a newer version as they stop updated plugins for older versions
-RAW files will need to be corrected, and then processed into JPEGS for final use. This will involve a lot more time on the computer

PROS OF JPEG

-JPEG is the Standard image format. Want to put an image online? JPEG. What format do most photo labs want? JPEG. Want to email an image to your buddy? JPEG. Pretty much every computer can read a JPEG somehow.
-Smaller file sizes. Even at the highest quality JPEG, the image will be a fraction of the size of a  RAW file.  You can set different JPEG quality levels to make the images really tiny…but don’t do that. You really want to keep this

CONS OF JPEG

-You will be losing quality, even at the HIGHEST quality JPEG setting. If you continually open and re-save JPEGS, each time you will lose more
-Exposure mistakes will not be as easy to fix. Over/under exposing by more than one stop will mean a lot of lost detail you can’t bring back

YOU SHOULD CONSIDER SHOOTING RAW IF:

-You are getting paid to take photographs. If you make mistakes in exposure or white balance, they are much easier to correct with RAW
-You want to have maximum image quality at all times

YOU SHOULD CONSIDER SHOOTING JPEG IF:

-You really aren’t that concerned with optimum control over your images
-You hate the thought of spending more time in front of a computer
-You never print your photos bigger than 8×10 or only post images online

RAW+JPEG

As you have probably already seen, you also have the option of shooting RAW and JPEG on most cameras. It will save both a RAW file, and a JPEG (Usually the HIGHEST quality JPEG, but sometimes it might default to a lower quality one, which frankly is useless…)

PROS OF RAW+JPEG

-When shooting a LOT of photos, like at a wedding, you may not need to do much correction to a large percentage of the images. In that case, you can just make your corrections on the RAW files that need them, and just use the JPEGs for the rest.

CONS OF RAW+JPEG

-Since it’s saving both a RAW and a JPEG file, it takes up EVEN MORE SPACE!

So as you can see, there are lots of factors to consider when making the decision to shoot RAW or JPEG. For the record, I shoot RAW+JPEG. But don’t just do as I do, do what works best for YOU.
My best advice is to try out both and see how you feel about them!
Happy shooting!

Noel

DO YOU HAVE A QUESTION FOR NOEL? ASK AWAY:

Please complete the required fields.
Please select your image(s) to upload.

MORE ASK NOEL QUESTIONS!

Ask Noel

(245)